Saturday, September 15, 2012

Red Bean Moon Cake with Flaky Pastry (紅豆螺絲酥皮月餅)


Last week I went to school to help out the hospitality students to understand cultural diversity.  Six of the parents participate all came from different background including Thai, Indian, German, South African, Italian and Chinese.  One of the thing we were taking about was the festival celebration, and I mentioned that lots of Chinese dessert for celebration was round as the roundness mean smooth and harmony.  The Chinese Moon Festival is coming up on 30 September and I got the idea making this flaky pastry mooncake from my mother-in-law when she posted her taro mooncake on FB.

I always have difficulty in making the swirl looking flaky pastry and I got the step-by-step instruction from Cherri, ch3rri blossoms.  I use canola oil instead of shortening as it is a healthier oil and I baked it instead of deep fry.  The other popular flavour for the mooncake include taro, green tea and lotus.  Moon cake usually has an salted duck egg yolk inside the filling, I have opted that out as I prefer it eggless.

The Moon Festival is the second biggest festival besides the Chinese New Year.  People give mooncake as a gift and everyone gather together for a family dinner on a full moon night.  A true happiness for me is to enjoy the time with my family, just as simple as that.


Red Bean Moon Cake with Flaky Pastry
(make 16)

Ingredients:

Filling:
red bean paste (store brought)

Water dough:
200g plain flour
1/2 teaspoon white vinegar
50g canola oil
30g sugar
100g water

Oil dough:
180ml plain flour
100g canola oil

Method:

  1. Roll the red bean paste into 16 golf ball sized balls.
  2. For the water dough; mix all together to form a dough, rest 20 minutes.  Then divide into 4 equal portions.
  3. For the oil dough; mix all together to form a soft dough, divide into 4 equal portions.
  4. Flatten the water dough and place the oil dough into the middle and wrap around it.  Do not flour the bench as the dough is oily enough and will not stick to the table.
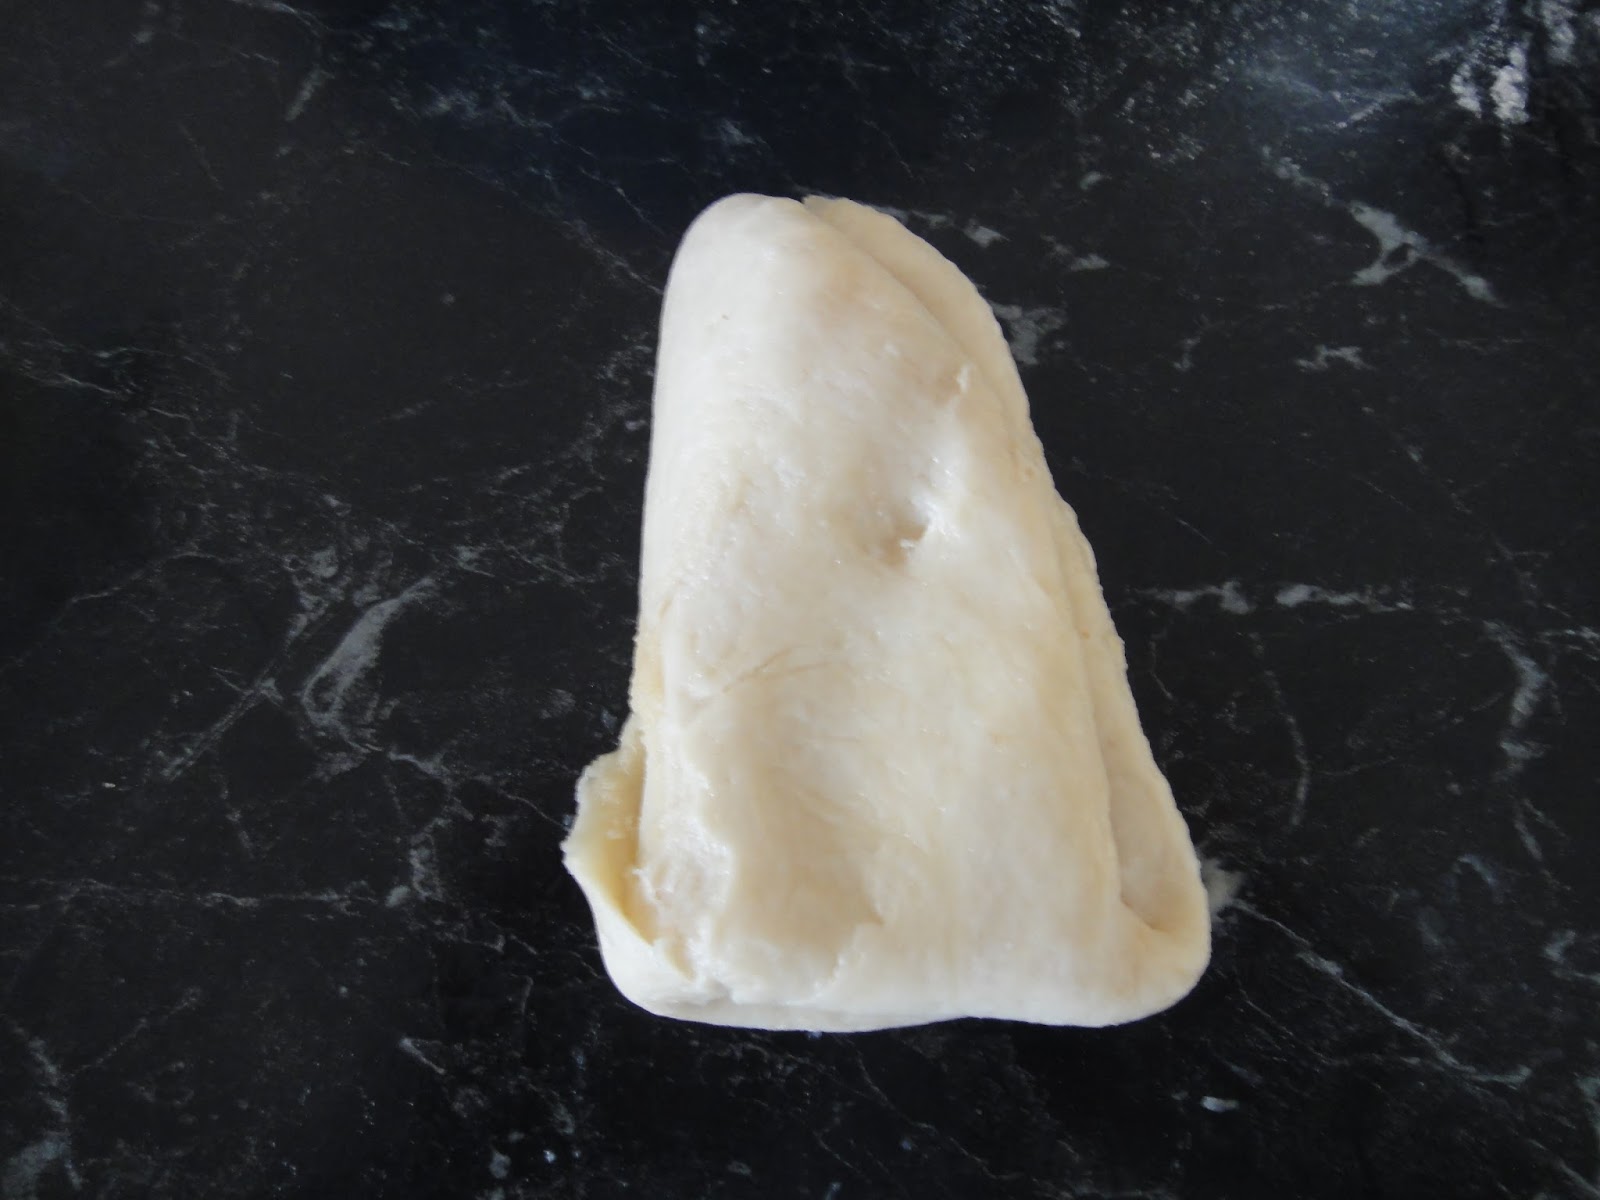
  5. Roll out the dough into a long shape, fold half from the short side, then fold over to the right.  Roll out one more time.
  6. Then roll into a swiss roll from the long side, cut into 4 pieces.
  7. Roll each piece flat into a round shape, about the size of the dumping pastry.  Place a piece of red bean paste into the middle, wrap around to form a ball and seal the bottom.  Repeat for the rest of the dough.
  8. Preheat oven at 170c. Place the mooncake sealed size down onto the paper lined baking tray(s), bake 25 mins or until brown.
Source: http://ch3rri-blossoms.blogspot.com.au/2009/12/flaky-taro-pastry.html

water dough and oil dough
Flatten water dough and oil dough on top
Oil dough wrapped inide of the water dough
1st time roll out 
roll half from long side
roll half to the right
2nd time roll out
cut into 4 pieces
Roll flat and fill with filling
ready to bake! 


Saturday, September 1, 2012

Honey, Peanut Butter & Tomato Drumsticks


This Sunday is Father's Day for the Australian.  Chicken is the most popular meat and my husband will not sick of having chicken everyday.  This chicken drumstick would be a great dish to give the male a treat!  The original recipe use tahini (sesame paste) but I replace that with peanut butter and sprinkle the sesame seeds over the roasted chicken instead of baked with it coated.  After all these modification, I could't think of a name to it but I love this Asian kind of twisted dish!

Have a happy Father's Day!

Honey, Peanut Butter & Tomato Drumsticks

6 Chicken Drumsticks
1 heap tablespoon peanut butter
1 heap tablespoon tomato paste
1 1/2 tablespoon honey
1 teaspoon Chinese five-spice powder
1/2 teaspoon chilli powder
salt and pepper
few drops of sesame oil
1-2 teaspoons sesame seeds, toasted

Method:

  1. Marinate the chicken with peanut butter, tomato paste, honey, chilli powder, salt, pepper and sesame oil.  Let stand for 10-15 minutes.
  2. Preheat oven at 200c.  Place the baking tray with baking paper, arrange the drumsticks onto the tray and spoon all the sauce over the chicken.
  3. Bake for 40 minutes or until the chicken is cooked.  Turn over once or twice.  Sprinkle with toasted sesame seeds before serving.
Source: adopted and modified from the cookbook, "I Love to bake!" by Tana Ramsay

Tuesday, August 21, 2012

Easy Banoffee Pie


Last time when I went to a morning tea gathering at school, one of the mum brought along a Banoffee pie.  They were saying that this was an American type of pie so I took a piece of it and it tasted pretty good.  It is basically a caramel tart topped with whipped cream and banana.  With the search of the internet, it is found that the birthplace of this pie actually come from The Hungry Monk restaurant from the UK.  The word banoffee means any food product that has the taste of banana and toffee.  It was created in the 1972 and it became popular in the America, Australia and India as well.  For more information please click here.  In Australia, caramel tart is very popular and it sometimes served with whipped cream.  When I went to boarding school, it would be everyone's heavenly day to have caramel tart for dessert.  To simplify the recipe, I use Top'n Fill caramel instead of the condensed milk.  If you wish, you can follow the traditional method to boil the tin for 1 1/2 hours to make the caramel.  Can you believe that such a yummy dessert only take 4 ingredients?

Banoffee Pie

1 tin of Nestle Top'n Fill Caramel
1 frozen pie crust
whipped cream
banana, sliced

Method:

  1. Bake the pie crust follow the direction of the package.  Just when the crust starting to turn brown, spread the caramel into the pie shell and baked for a further 5-8 minutes.  
  2. Cool pie to room temperature, spread with whipped cream and top with some sliced banana.  Chill before serving.


Friday, August 10, 2012

Homemade Orange and Lemon Marmalade


If you start making jam, it's unlikely that you'll ever stop.  I made enough jam to give to my family and to keep for myself.  Just when I want to pack up, my daughter's piano teacher gave me some homegrown orange and lemon again.  So this continue my jam making journey....

I didn't have enough orange to work out a recipe for marmalade the last time when I had those unwaxed organic oranges.  For full story, please click here. This year I had a bit of a trouble as I mistaken an orange looking lemon making the first batch of jam too tangy. So I made another lot and mix it with the first batch untill I'm happy with the taste. The addition of lemon to the marmalade makes it tastes different (the taste that I prefer) but you can omit that if you don't like it too tangy.  Mrs piano likes to have her marmalade with bacon and egg, I'd never tried that though.  I'd prefer to make my marmalade almond muffins again.

Orange and Lemon Marmalade
(bread machine method)

1/2 lemon, flush only, chopped
About 4 oranges, included the grated zest and chopped flush to make up 550g with the lemon flush
1 2/3 cups sugar
2 1/2 tbsp Jam Setta

Method:
Put the chopped fruit into the bread machine followed by sugar and Jam Setta.  Press the "jam" button and finish the cycle.  Pour hot jam into sterilised jar and seal.  Keep into the fridge to keep it fresh. 


Tuesday, July 31, 2012

To celebrate my blogiversary with the Cafe au Lait Choc Cake and an Award


So I have made it, my 2nd year of blogging.  For the past few months, I have been trying to seek for other interests besides blogging.  But I find that blogging has become a part of my life, it is such an easy way to share recipes with my family and friends, and meeting like-minded people.  It is your comments that keep me going, it is your inspiring recipes that keep me logging in...so I'm still here to share what I cooked in my kitchen, what I feed my family and what makes me happy.  I may not be able to read and comment your posts all the time but I do enjoy it when I have the chance.  If you want to connect with me at facebook, please click a like at my page here.

I baked this cake for my daughter's birthday as she loves everything french.  It is a lovely cake for celebration and only if I have some cachous (little silver balls) could make this cake even more beautiful!  I hope you like it!

I received this award from Andrea at Get Your Feast On just before my blogiversary.  Andrea has the interests in cooking and fashion and she has combined both of these elements in her blog.  I started blogging when I stayed home to recover from illness, so every blogiversary also mean another year of good health to me.  When I received my first award, I feel the satisfaction of the hard work I've done.  Therefore, I decide to give this award to any blogger(s) that has not received an award yet.  Simply grab it, pass it on and follow the rules below if possible and enjoy blogging delicious food!

The rules are: 
  • Thank the person who nominated you and link them back. 
  • Share a little bit about why you started blogging.
  • Copy and paste the award onto your blog. 
  • Nominate up to 10 other bloggers you think are addictive enough to deserve the award.


Thanks again for your friendship to accompany my journey of cooking!

Cafe au Lait Choc Cake


1/2 cup cocoa powder
1 cup strong coffee (I use 2 teaspoons instant coffee powder mixed with 1 cup hot water)
2 1/4 cup cake flour
1 1/2 cups caster sugar
1 tbsp baking powder
1/3 tsp salt
3/4 cup butter, softened
3 eggs
2 tsp vanilla essence

For the coffee cream:
300ml thickened cream
icing sugar
1-2 teaspoons instant coffee powder mixed with 1 tbsp hot water

For the chocolate leaves and decoration:
white chocolate
dark chocolate
rose leave
rose petal
a rose

Method

  1. Beat butter with sugar until creamy and fluffy.  Add eggs one at a time and mix well. 
  2. Add coffee to the butter mixture. Stir in sifted flour, cocoa powder, baking powder, salt and vanilla essence.
  3. Pour mixture into a paper lined 23cm round tin and bake 25-30 minutes at 180c.
  4. Spilt cake into half, filled and decorate with coffee cream and chocolate leaves. Decorate the side of the cake with chocolate rose petals and topped the cake with a rose.
  5. For the coffee cream, whip the cream till thicken then add in few tablespoon of icing sugar.  Then mix well with the coffee mixture.
  6. For the chocolate leave and rose petal: melt chocolate in microwave at medium heat until smooth.  Use a paint brush to brush some chocolate onto the leaves or paint 1/2 of the rose petals.  Leave the chocolate to harden in the fridge if needed.  Then peel off the leaves and decorate as you wish. Don't need to peel for the rose petals.

Source: adopted and modified from the cookbook, "Great Cake" published by the Country Living.


Saturday, July 21, 2012

Mini Cheesecake Topped with Homemade Pineapple & Passionfruit Jam


I have been blogging for nearly 2 years but I have never had a post for cheesecake.  In an actual fact, I love cheesecake but nobody like it in my household.  Every time when I walk pass the cakes shop and my eyes will be loading onto the cheesecake.  I have this block of cream cheese in the fridge for so long (not expired yet) and it has been calling me to make into cheesecake every time when the fridge door is opened.  I decide to make into several small one so that I can give them away and I could still have some for myself, therefore I won't be too guilty eating the whole lot.

This post come with the pineapple and passionfruit jam recipe I mentioned from the previous post.  For the bread machine method to make strawberry jam to make the jam drop cookies, please click here.  If you ever wonder what's the different between preserves, jams and jellies, preserves resemble jams but have larger chunks of fruit while jams are mashed fruit cooked with sugar until thick.  Jellies are very firm, translucent spread made of fruit juice boiled with sugar.


Mini Cheesecake Topped with Homemade Jam
(make 8)

1 packet of Nice biscuits (or digestive biscuits)
100g margarine, melted
1/2 teaspoon ground cinnamon

For the filling:
250g low-fat cream cheese
1/2 cup caster sugar
1 1/2 tablespoon lemon juice
1/2 teaspoon vanilla essence
2 eggs, beaten

For the topping:
Pineapple & Passionfruit Jam or Jam of your choice
300ml Thickened Cream, whipped with a tablespoon of icing sugar

Method:

  1. Process biscuits into fine crumbs through the processor.  Place crumbs into a bowl, add in melted margarine and cinnamon.  Mix well. 
  2. Spoon and press the crumbs into 8 x 12cm tart cases. Fill the side with crumbs as well.  There could be some leftover crumbs. Keep the base chill in the fridge while making the filling.
  3. Beat cream cheese and sugar until soft and creamy,  then add in eggs, lemon juice and essence.  Stir though till smooth.
  4. Bake in a pre-heated oven at 150c for 20 minutes or until the filling is cooked.  Leave the door ajar and cool the cheesecake in the oven for 10 minutes.  
  5. Leave the cake cooled at room temperature.  Then spread a layer of whipped cream over the top and pipe some cream around the edge.  Spoon in some jam in the middle of the cake.  Keep the cheesecake into the fridge. 

Pineapple and Passionfruit Jam (Bread Machine Method)
( make about 700g)

460g net fresh pineapple flush, chopped into pieces
40g net passionfruit pulp (about 3 passionfruit)
1 2/3 cups of caster sugar
2 1/2 tablespoons Jam Setta

Method:

  1. Use the pulse action, coarsely process the pineapple. Don't over-process as the jam will be too smooth.
  2. Add the pineapple and passionfruit into the bread machine followed by sugar and the Jam Setta.  Select the "button" and start the cycle. 
  3. Meanwhile, clean the bottle with soapy water.  Switch on the oven at 120c and tip the bottle upside down into the oven rack.  Sterile the bottle in the oven for 10 minutes or until the moist is evaporated.
  4. Pour jam into the bottle, moisten one side of preserver covers (clear plastic) with vinegar and place over the damp side up over bottle while jam is still hot.  Cover with the lid and plastic band. If possible, keep in fridge to keep the jam fresh.


Tuesday, July 17, 2012

Almond Jam Drops with Homemade Strawberry Jam


So it is time to make some jam as the market is filled with delicious and sweet strawberries.  My mother-in-law is visiting us later this year and she has ordered two bottles of jam already.  Jam is a good gift as it always taste better than the commercial one, and it's made with your heart but doesn't cost you heaps! I  have made a bottle of strawberry and another one with pineapple and passionfruit from my bread machine.  The passionfruit tree in our yard grow like grapes and I think I have collected more than fifty passionfruit so far.  That's another good reason to make jam with seasoned fruit so you can enjoy them a bit longer.  I will post the recipes of those jam in my next post.

I'd say I have a collection of quite a few yummy cookies recipes but I don't get a good one from jam drops.  Such a simple cookie but I always have problem with the recipe that the cookies are either too hard or too sloppy and most of the time the jam goes all over the cookies.  Here is my new found from Tana Ramsay's cookbook!  It is the best I have so far, it's chewy, rich in butter taste and the jam sits in the middle of the cookie liked a jewel.

Almond Jam Drops
(make about 35)

185g butter, softened
1 tsp vanilla essence
165g caster sugar
2 egg yolks
60g almond meals
1/2 tsp baking powder
strawberry jam

Method:

  1. Pre heat oven to 180c.  Line 2 baking tray with baking paper.
  2. Beat butter, vanilla and sugar until creamy and fluffy.  Beat in the egg yolks.  Fold in the sifted flour and baking powder, then almond meals.  Mix until all combined.
  3. Take a tablespoon of the dough and roll dough into a ball. Place onto baking tray and make a 1cm deep hollow with the end of a chopstick.
  4. Fill the cookies with jam and bake for 15-20 minutes until the cookies turn slightly brown.  Cool biscuits on a wire rack.
Source: Modified and adopted from the cookbook, "I Love to Bake" by Tana Ramsay.