Saturday, July 27, 2013

Chocolate & Salted Caramel Heart-shaped Tart and a Speedy Recovery


My dear friend, I will be starting my 6 months of chemo treatment in 2 days time.  After the surgery, the doctor told me that I had cancer and instantly my body kept shaking even my mind was very clear, thinking how should I deal with this trauma again.  Having had two cancers within three years were not easy to handle. The doctor had been telling us good news all the way until the pathology report had been given.  Those two weeks before and after the surgery were so stressful, worrying that I could be sick again.  I did not know how to tell my husband as I knew he would be very disappointed as he said to me, "Aren't you suffering enough?" I was liked a child telling the doctor that I'd been good all these years and wonder if I could live till 50 years old seeing my kids become adult.  It was a comfort that he said he'd seen a lot of patient like me and they were all well.  I'm grateful that out of this bad luck, my survival chance is still very high. Just because I care of my health and I find this cancer early to save myself.  So here I'm, ready for another battle and learn to be a healthier and happier person.

During the recovery time, many people came to visit me, giving me flowers and leaving comments at this blog.  I could see the love and care from those kind-hearted people. (especially to you, Delynne if you're reading, my friend) I became a more relaxed person and what I really enjoy was to have a good family time watching TV together, waiting my husband came home from work and sat besides him for dinner.  I don't dream about holidays or luxury things as I treasure every moment I'd with my family and live the way as simple as I can.  I hope this type of stress free lifestyle could make me cancer free. I went to see a doctor last week and my blood test show that my health is at it best for years, so thanks for the good diet and stress-free mind!

I made this chocolate tart before I had the surgery.  I decided to have sweet food only for birthdays to maintain a healthier lifestyle. I leave the baking to my children if they want to have some cakes or cookies.  Now I meditate, read books, pray and exercise.

It's a six years of promise for me to make something chocolate out of the BBC magazine for my husband.  He probably has forget about it but I haven't!  When I tidy up my pile of food magazines, this little chocolate recipes book catches my attention and I decide it's time to make my promise!

I haven't made pastry for a while and winter is the best time to make it as the cold weather helps to keep the pastry in shape.  It needs a bit of patience to make the salted caramel as it takes a full attention to keep stirring and waiting for it to thicken. I use less salt for the caramel as I have been using salted butter for the pastry and the chocolate filling. The pastry is crispy and the chocolate custard filling is not too sweet, not over powering the sweetness from the caramel.  It gets too sweet if you add loads of ice-cream as my family do, I prefer to have it with just a little bit of ice-cream or some fresh cream.

I guess it's not too late to make my promise after six years of waiting! And thanks again for those supportive comments and the new likes at my facebook page!

Chocolate & Salted Caramel Tart
(make 6 small or 1x 20cm tart)

Ingredients:

For the pastry:
1 1/3 cups plain flour
2 tablespoons caster sugar
2 tablespoons cocoa
100g unsalted butter, cubed (I use salted)
3 egg yolks
2 drops of vanilla extract

For the salt caramel base:
1 cup caster sugar
125g salted butter
1/3 cup thicken cream
1/2 teaspoon sea salt flakes (I use 1/3)

For the chocolate filling:
2 tablespoons caster sugar
1 egg plus 1 egg yolk
100g milk chocolate button
75g unsalted butter (I use salted)


Methods:

  1. Place the flour, sugar and cocoa in a food processor and process until combined.
  2. Add butter, eggs and vanilla into the dry ingredients and process in a pulse motion until the mixture form a dough.  Shape the dough into a ball and flatten into a disc shape.  Wrap with cling wrap and chill for 30 minutes in the fridge.
  3. Meanwhile, make the salted caramel.  Boil sugar and water in a pan on low heat until sugar dissolves.  Stir in butter, turn on heat to medium and simmer for 20 minutes, (it takes me longer than that, about double of the time) stirring occasionally until it turns to caramel colour.
  4. Remove from the heat and stir in half of the cream.  When the mixture stops bubbling, stir in remaining cream and sea salt. Let it cool.
  5. Take the dough out from the fridge.  Divide into 6 equal portions.  Roll out pastry and press onto the tart tins. Chill for another 15 minutes.
  6. Meanwhile, make the chocolate filling. beat the sugar, egg and egg yolk in a mixing bowl until thick and pale. Melt the chocolate and butter in microwave at medium heat for 30 seconds, then another 20 seconds until they are melted, stir to smooth out the mixture.
  7. Preheat the oven at 200c (180c fan-forced), line pastry with baking paper filled with ceramic beans.  Baked blind for 12 minutes.
  8. Spread 1 tablespoon of caramel sauce over each pastry base, spoon about 3-4 tablespoons of chocolate mixture evenly on top. (I only use half of the caramel and use the other half for ice-cream topping) Bake for another 12 minutes or until the chocolate topping is set, firm to touch. (It takes me longer than 12 minutes) Let cool, remove from the tins and serve with ice-cream and extra caramel sauce.    

Adopted and modified from BBC Australian Good Food Chocolate Classics, August 2009.

Saturday, June 29, 2013

An Unexpected Health Issue and 3 Years of Blogging - Devil's Food Cake II


My dear friend, I'm afraid I have to leave you for a while as I am going to have an unexpected surgery tomorrow that require a period of resting.  It had been 3 years since I had my last surgery.  I am afraid to go to the hospital again but it is important for me to maintain good health to live in this beautiful world.  Let's hope everything goes well!

I am excited that I'm reaching my 3rd year of blogging at the end of July! I have never stay in a hobby for that long and you can see how much I love spending my time in the kitchen. I am pleased that I've learned from you, not only about food, it's all about sharing love and experiences.

I made the strawberry devils food cake for my son's birthday last year.  Then I find this recipe at the back of the flour packet with the name as "indulgent chocolate fudge cake" which is very similar to the recipe of devil's food cake using bicarbonate soda and milk.  It's the best ever rich chocolate cake so far judged by my husband, he actually ate two big slices in one go, very naughty! I guess we should act like a devil sometimes!

For the left-over cake, simply heat up in the microwave, the ganache melted to be a fudge topping, serve with some ice-cream will be a great winter dessert. I'll recommend using Lighthouse's self-raising flour and Cadbury's cocoa for the recipe, they work well together and the cake is moist and soft!

See you soon, good health to you all!

Devil's Food Cake II

Ingredients:
1 cup Lighthouse cake & biscuit self raising flour
1 cup caster sugar
1/2 cup Cadbury Bournville cocoa
1/2 teaspoon bicarbonate soda
120g dark chocolate
200 butter, diced
3 eggs, beaten
3/4 cup milk

Chocolate Ganache:
150g milk chocolate
25g dark chocolate
1/3 cup plus 1 tablespoon thicken cream

Methods:

  1. Preheat oven to 170c (150c fan-forced), line a 20cm round cake tin with baking paper.
  2. Sift the flour, sugar, cocoa and bicarbonate soda into a mixing bowl until mixed through. 
  3. Melted butter and chocolate in a double boiler over simmering water.  Let cool slightly.
  4. Add the eggs, milk and chocolate mixture into the dry ingredients. Stir till well combined.  Pour the cake batter into the cake tin and bake for 40 minutes or until the skewer comes out clean after inserting into the cake.  Let the cake cool for a few minutes in the tin before transferring to a wire rack.
  5. To make the ganache: add chocolate and cream in a double boiler over simmering water until smooth.  Cool the chocolate mixture into the fridge until it becomes thick and spreadable.
  6. Decorate the chocolate cake with the ganache.


Sunday, June 23, 2013

Apple Slices


Besides the satisfaction of feeding the long queue of hungry kids, one of the good thing being a volunteer at the school tuckshop is to learn new recipe.  I first came across this apple slices through a funding raising event, it was the best slice for the day! It bet all the cupcakes and sweet tart. While the taste of this slice still fresh in my mind, I find it selling at our school tuckshop. It must be a very common slice but I have never seen it before. The two slices that I have are quite different (one not baked for the topping and the other baked with a sprinkle of cinnamon) and I prefer the first one I have at the fundraising.  After searching recipes from the internet and a bit of modification, this is what I make to my liking.  Crispy coconut, buttery base with the fresh taste of soft apple and custard cream topping with a hint of cinnamon.  What can you ask for more than that?
  
Apple Slice

Ingredients:

For the Base:
1 1/3 cups self-raising flour
2/3 cup caster sugar
1 cup desiccated coconut
125g butter, melted
1 teaspoon vanilla

For the filling:
2 1/2 large Granny Smith green apple
plus 2 tablespoons brown sugar
1/2 cup water

For the topping:
250g lite sour cream
1 egg, beaten
ground cinnamon

Method:

  1. Line a slice pan with baking paper.  Preheat oven to 180c.
  2. Mix the dry ingredients of the base into a mixing bowl, add in melted butter and vanilla till all mixed.  Add to the baking pan and press to flatten the base evenly.  Bake for 20 minutes.
  3. Peel, core and cut the apple into cubes.  Add the apple into a saucepan with water and sugar, bring it to the boil. Turn down to medium heat and simmer until the apple is cooked and the water nearly evaporated.
  4. Drain off excess water and spoon in the apple onto the base.
  5. Beat together the sour cream and egg, sprinkle with a little cinnamon.  Put the slice back to the oven and bake for another 15-20 minutes at 160c.
  6. Cool the slice in pan before cutting. This slice is best serve on the day of cooking.  


Thursday, June 13, 2013

Pork & Bean Enchiladas


There is so little I have known about Mexican food.  We make nacho, taco and tortilla quite a lot but that's probably what I have been up to.  Last year, I went to a Mexican themed party hosted by my dear American friend, she used her Mexican relative's recipes making a range of food including some chilli black bean and that was quite interesting.  I found that this enchiladas recipe from the newspaper using only kidney bean.  I modified it a bit adding pork and avocado & sour cream topping to suit my family's taste. I add the topping because it is quite dry with the mince and bean and I have to say that I love the taste of coriander in this dish.

Pork & Bean Enchiladas
(make 5 rolls)

Ingredients:
520g pork mince
200g tinned red kidney beans
500g tomato pasta sauce
1 onion, finely cut
3 garlic gloves
2 tablespoons cumin
1/2 teaspoon chilli powder
grated cheese
salsa sauce
avocado
lite sour cream
fresh coriander
salt & pepper
5 Mission sun-dried tomato & basil wraps or any tortilla wraps

Method:

  1. Heat oil in pan, cook onion and saute until onion starts to soften.  Add garlic and pork mince and cook till it changes to brown colour.  Add cumin, chilli powder, 1 cup of pasta sauce and 1/2 of the coarsely mashed red kidney beans. Simmer on low for a few minutes then add the rest of the whole beans.  
  2. Divide the filling into 5 portions.  Fill the tortilla wraps with the filling and roll up, place the end downward.  Arrange tortilla into a baking dish, spread the rest of the pasta sauce over and sprinkle with grated cheese.
  3. Bake for 20 minutes or until golden brown in a preheated oven at 180c.
  4. Mix the diced avocado with salsa sauce.  Cut the enchiladas half and arrange onto the serving plate. Top with avocado salsa mix and sour cream.  Sprinkle with some fresh coriander and serve with green salad.


Wednesday, June 5, 2013

Hong King Style Chicken & Potato Curry


Growing up in a traditional Chinese family, my mum is the main cook for the family and she only cook very typical Chinese dishes.  Dinner would be steamed fish, some stir-fry chinese vegetable, a meat dish with some soup.  My dad would cook once in a while, this curry dish is one of his favourite.  I always look forward for this dish because I love spicy food. Over the time, I have added lemon grass, more spice into this curry to make it more tasty to suit my family.  This curry is not hot as the Indian or South-East Asian's, to me it's a Level 1 training to enjoy the curry dish.

Potato is very important in the dish, it helps thickens the sauce and most of the time what's left over is not potato but chicken.  


Hong Kong Style Chicken & Potato Curry
(serve 4)

Ingredients:
900g chicken (a mix of wings, thighs and drumsticks)
1 small onion
2 lemon grass
4 washed potatoes or any potatoes
1-2 tablespoons oil
1 tablespoon garlic mince
2 tablespoon curry powder
1/4 teaspoon ground coriander seeds
1/4 teaspoon garam masala
1 cup water
1 cup lite coconut cream
1/4 cup evaporated milk
1 teaspoon sugar
1 1/4 teaspoon salt
salt and pepper for marinate
Methods:

  1. Remove as much fat and skin from the chicken.  Cut the chicken into chucks and marinate with salt and pepper for about 1 hour.
  2. Cut onion into cubic chuck, peel skin off potatoes and cut into chucks, use the root of the lemon grass and cut diagonally into 2 to 3 pieces.
  3. Heat oil in a big saucepan, saute the onion and garlic then add the lemon grass and chicken.  Stir through until chicken starts to turn brown, add 1 cup of water.  Turn down the heat and let it simmer for a few minutes, then add curry powder, ground coriander and garam masala and potatoes and stir through.  Let it simmer for 5 minutes. Keep stirring for a few time.
  4. Add the coconut cream, evaporated milk, salt and sugar into the curry, cover the lid and let it simmer for 25 minutes until the chicken and potatoes are cooked.  Keep stirring for a few time to make sure the curry doesn't stick at the bottom, add more water if it turns too dry.
  5. Serve with rice, salad and Indian bread. 


Friday, May 31, 2013

Oat Milk Chai Latte


We have winter comes in late this year and it seems that we get cold all of a sudden. This winter we have lots of clouds making it quite cold during day time. I have two sicks kids within a week.  We have been missing the sun from the sunny Queensland. All I want to have the whole day is hot drinks.  I have been on hot chocolate for a while and now I am into oat milk again.  Just because I have to watch out for my cholesterol, I make up this Chai Latte using oat milk.  It keeps me warm and make me healthy, yes it has only 1% of fat!

Oat Milk Chai Latte
(make 1 tall glass)

1 cup Vitasoy Oat milk
1 ceylon tea bag
2 teaspoons of sugar
ground cinnamon
extra froth oat milk or cow's milk

Method:
Pour the oat milk into a small saucepan, place a tea bag on the side and let it simmers for about 1 minute till the milk is hot and the tea infused into the milk.  Add the sugar and sprinkle with cinnamon powder.  Leave the heat and make froth milk.  Pour the milk into a tall glass and top with froth milk.  Enjoy!


Wednesday, May 29, 2013

Not Quite High-Hat Cupcakes


I got this recipe from my daughter through an email with a title of "Make this".  We don't leave apart and in an actual fact, her room is right next to mine.  This is the modern way of talking to each other, I guess!

I made it for her 16th birthday, a very sweet cake for a sweet 16! It was a bit too sweet for everyone but just let it be sweet .... leaving us a sweet memory!

I should have watched the video on how to ice the chocolate icing beforehand because the high hat shrink and I much prefer icing with dark chocolate than milk chocolate! Overall, I am please with the result, at least it's edible! I think it's a beautiful cupcake, don't you?

There are two versions of the recipes from Martha Stewart's High-Hat Cupcakes, I use version 1, please check the recipe and video here, and version 2 uses commercial cake mix and the frosting don't use almond essence, whether it's better or not, I'd have to make it to find out. Please click here for version 2 recipe.


Thursday, May 9, 2013

Pumpkin and Ricotta Puffs with Avocado Green Salad


Mother's Day is one of the big promotion for retail stores and restaurants, you see the ads for gift ideas everywhere or ads for Mother's Day special at the local restaurants. We like to give kitchen appliances for my mother because she can use it to cook delicious food for us!  My husband bought me this Phillip's Air Flyer last year, although not a Mother's Day present but I just loved it!  It cooks wonderful crispy potatoes chips and chicken wings without using any oil.  It doesn't only fry food with less oil, you can also baked creamy potato gratin or pasta using its brownie pan.   It is a good kitchen helper that now sit permanently at my kitchen bench. The cooking time is shorter than a built in oven as it takes less time to heat up and the food get both sides cooked nicely.  The downside is that it only has a small cooking tray and the maximum temperature goes up to 200c.  However it's a great helper if you need an extra oven to cook up something small within a short time.

I roast the pumpkin using the Air Flyer and it takes only 12 minutes to get done.  Then I bake the puffs in the big oven.  The avocado salad goes well with the puffs, these day I just prefer something light liked this.  I'm expecting my kids to make me breakfast in bed, some raisin toast with a glass of oat milk would be nice!

Have a Happy Mother's Day!


Pumpkin and Ricotta Puffs with Avocado Green Salad
(make 8)

350g pumpkin
1 tablespoon oil
1/2 teaspoon salt
40g cashew, toasted and grounded
1 tablespoon parmesan cheese
2 tablespoon light ricotta cheese
extra 1/4 teaspoon salt
pinch of chilli powder
2 sheets of puff pastry
egg wash for glazing

Avocado Green Salad:
Leafy Mixed
1/4 of a whole avocado
lemon infused olive oil
white rice vinegar


Methods:

  1. Cut off the skin and seed of the pumpkin and cut into cubes.  Season with salt and oil, toss through.  Then place into the cooking tray of the Air Flyer and cook for 12 minutes at 180c.
  2. Mesh the cooked pumpkin with the back of the fork, add in the cashew, parmesan cheese, ricotta cheese and season with the extra salt and chilli powder.
  3. Cut the puff pastry into quarter, brush the sides with egg.  Place a heap tablespoon of pumpkin mesh on a corner, seal.  Repeat for the rest of the pastry.
  4. Line a baking tray with baking paper. Bake in hot oven, 230c until it puffs up and starting to turn golden brown, turn down to 180c until the puffs turn all golden brown. 
  5. Rinse the leafy mix under the sink and drain, cut the avocado into cube, dress with the olive oil and vinegar.


Saturday, May 4, 2013

Hummingbird cupcakes with marmalade icing


I made these cupcakes due to two mistakes, first I bought the wrong type of tinned pineapple for making pizza, second I poured 5 times more crushed pineapple into the cake batter instead of the required amount.  These sound like a kitchen disaster was approaching.....

I used the pineapple for the pizza anyway and it was not too bad.  Then the rest of the tin had to be consumed and I remembered there was a recipe of hummingbird cupcake using it.  The last time I made this cake, it didn't really reach my expectation, it's probably the recipe's fault. It also need a lot of ingredients to make this cake that you really need a plan to shop all the things you need.  So here we go, I'm just lucky to have all the ingredients at home, including the ripe bananas.

With a high hope of having another round of a trial of the recipe, I ended up with a puddle of cake batter by adding too much pineapple.  Should I add more ingredients to make more cupcakes or should I add more flour to thicken the batter?  The later option was a good choice as the cupcakes came out moist with a good balance of flavour.  My husband loved it and asked me what's in the cake, he named a few but couldn't name them all... so I bet him and won the game of naming ingredients.

Most icing for hummingbird cake used cream cheese, this one used homemade marmalade with whipped butter cream and that was the killer part of this cake!  It would be a great cake to serve at a high tea on Mother's Day!

Have you ever make something amazing by mistake?


Hummingbird cupcakes with marmalade icing

125g plain flour
125g self-raising flour
1 teaspoon baking powder
1/2 teaspoon cinnamon
125g caster sugar
115ml sunflower oil
2 eggs
150g mashed banana
1 1/2 tablespoon grated orange zest
60g grated carrot
60g desiccated coconut
440g tin of crushed pineapple

For the icing:
58g unsalted butter, softened
75g icing sugar, sieved
1 tablespoon orange juice
1 tablespoon marmalade

Method:

  1. Preheat the oven to 175c. Place the muffin tin with paper cases.
  2. Beat the oil and sugar till creamy than add in one egg at a time and beat until well mixed.
  3. Add in sieved flour, baking powder and cinnamon into the egg mixture and stir.  Then add in the rest of the ingredients and stir till combined.
  4. Spoon the batter into the cases until 3/4 full.  Bake for 25 minutes or until cooked.  Cool the cake in the tin for 5 minutes.
  5. Remove the cupcakes and cool the cake on a rack before icing.
  6. For the icing: beat butter and icing sugar till light and fluffy, add the orange juice and marmalade and stir.  Smear the icing onto the cupcakes before taking a big bite!


Friday, April 26, 2013

Potato Salad with Japanese Mayo and Pine Nuts


This is one of my new creation and I eat this as a light meal on my meatless day or serve as a side salad with burgers.  As I found that having a potato salad with just potato is too plain, by adding some greens into it adds more fibre and the pine nuts simply is a nice garnish with a bit of a crunch.  I choose to use Japanese Mayonnaise because it has a full flavour of whole egg, bears in mind though it has 80% of fat so don't over dressing it as I know it is hard not to!  My sister fed her fussy 2 years old with this salad and she just sat quietly and ate them all.

Potato Salad with Japanese Mayo and Pine Nuts

4-5 baby potatoes
a bowl of leafy mix (fancy lettuce, baby spinach leaves, rockets and beetroot leaves)
a small handful of pine nuts, toasted
Japanese Mayonnaise
salt and coarse black pepper to taste

Method:

  1. Peel the skin of the potatoes (you can leave the skin if you wish) and cut into cubes.  Cook the potatoes cubes into boiling water until cooked.  If you can poke a fork into the cubes, it is ready.
  2. Drain the water and leave the potatoes cool.  Rinse the leafy mix with water and drain as well.
  3. Put the leafy mix and potatoes into a big bowl.  Add the pine nuts and mayo.  Seasoned with salt and coarse black pepper before serving.  Enjoy!


Thursday, April 4, 2013

Thai Style King Crab Salad


One year we went to Japan, our tour guide helped us to order some snow crab from Hokkaido express down to Tokyo.  We had watched many travel shows talking about how tasty the crab was so we didn't want to miss the chance while we were in Japan.  The crab was cooked and came with a pair of scissor to help cutting the shell.  It was one of the unforgettable moment we had in our trip.

I'd seen live Australian king crab in some Asian restaurants or in the aquarium but I'd never tasted it.  
The first time I saw it selling at Coles, I was wondering it would taste as good as the snow crab as both of them live in the cold region.  This crab salad hadn't disappointed us, the meat was not as strong as the mud crab but had more flavour than sand crab, it's flaky and sweet.  I like to serve mud crab as a hot dish and king crab is better to serve cold.

The importance of cooking Thai food is to balance the sweet and sour flavour, I do not have an exact measurement for this recipe as it's all up to your taste buds to tell you what to put in.

Thai Style King Crab Salad

King Crab claws (cooked)
cucumber
onion
chilli
coriander
mint
lime
salt & pepper
fish sauce

Method:
Remove crab meat from the shell.  Finely cut cucumber and onion, marinate with salt, then rinse and drain.  Squeeze out juice and add to the crab meat.  Add the chopped up the coriander, mint and chilli, seasoned with fish sauce, pepper, lime juice and sugar.  Serve cold.


Friday, March 22, 2013

Easter Bunny Popsticks


There is only a week away from Easter, this year I'm making chocolate bunny to give to people instead of store brought Easter eggs.  I found this "Make your own Easter Gifts" pack from IGA supermarket at $10.  It includes all the things you needed to make 12 chocolate bunnies.  I buy more chocolate melts and have been making many bunnies (I do lost count how many I've made as I eat some along the way...)


I have been experiment different flavour, and I like the Hundred & Thousand Bunny and Milk top bunny the most.  The pure white choc bunny takes longer time to set and it doesn't keep well at room temperature.  It would be great to have more mould so it would take me faster to do the job.  I found that reheating the melted chocolate is not good, so I put the extra chocolate into other chocolate mould to make something else rather than washing if off.  In my first lot of chocolate, I forget to press medium on the microwave and burn my chocolate so please be careful and never overheat the chocolate!

Aren't those bunnies adorable?  They're so easy to make and you should try it!

Happy Easter!

Easter Bunny Popsticks
(make 4 each)

For the milk chocolate bunny:
120g milk chocolate
Hundred & Thousand sprinkles

For the milk top bunny:
30g white chocolate
90g milk chocolate

Method:

  1. Wipe the mould clean with paper. 
  2. Melt chocolate in a microwave safe bowl on medium heat for 1 minute, then 30 second on medium heat until the chocolate is all melted. 
  3. Use a spoon to spoon chocolate into each mould until half full.  Place a popstick into each mould, then tap onto the table to ease the air.  Fill with more chocolate and tap again.  Don't over fill and top with hundred & thousand sprinkles.  Wipe clean and put into fridge for 15 minutes or until set.  
  4. For the milk top bunny: melt white chocolate on medium heat until melted.  Spoon chocolate into mould, tap off air and then put into fridge to set.  Meanwhile, melt the milk chocolate on medium heat and lay a popstick into each mould.  Spoon the milk chocolate over the milk chocolate and keep in the fridge for about an hour or until set.


Thursday, March 7, 2013

White Chocolate Fairy Cupcakes


Princesses and fairies, didn't we grown up from these lovely imagination?  When my daughter was little, she would wear her princess dress and crown to the shopping centre.  Everyone would waved at my little SnowWhite.  Her dress up box were filled with costumes, fairy wands and wings.  When her little friends came over for a play, they all dress up and became princesses or fairies from the far far away land.

I also become the fairy, the tooth fairy when my kids lose their baby teeth.  Kids wake up in the morning would find their teeth replaced by gold coins.  One time, my daughter lost her tooth into the drain while brushing her teeth. We wrote a little note to the tooth fairy to explain everything and luckily she found it and a gold coin was rewarded.  I often told them to brush their teeth probably because bad teeth would be taken by goblins.  I would soon retired from being the tooth fairy as my daughter had grown up and my son only has a few teeth to lose.  However,  I probably will be the Easter buddy and Mrs Santa for a long  time.

This white chocolate fairy cupcake had brought back many sweet memories to me..... and I made them for one of our staff's birthday because she had been a sweetheart to us.


White Chocolate Fairy Cupcakes
(make 12)

125g butter, softened
125g caster sugar
2 eggs
1 teaspoon vanilla essence
125g self-raising flour
75g white choc chips
1 tablespoon milk

Topping and filling:
strawberry jam
thickened cream, whipped
strawberries, halves
edible glitter
mini sugared love hearts

Method:

  1. Preheat oven to 190c. Place paper cases into a 12 hole muffin tin.
  2. Beat butter and sugar until light and fluffy, add beaten eggs and vanilla essence until well mix.
  3. Add in sifted flour and fold it into the mixture, stir in white choc chips. Add a tablespoon of milk or a little more to make a soft, dropping mixture.
  4. Spoon the mixture into muffin cases until 2/3 full.  Bake for 15 minutes or until a light golden brown.
  5. Cool in wire-rack.  When the cake is completely cooled, use a knife to cut along the top of the cake, take the top out and fill the inside with strawberry jam and cover the top.
  6. Pipe the cream onto the cake starting from the side of the cake, topped with strawberries or love hearts, then sprinkle with glitter. Magic may be coming on its way!


Wednesday, February 27, 2013

Banana cake to share with my neighbour


This banana cake is so moist and you must use four cavendish bananas and not less for the recipe.  I've used two bananas or added chopped walnuts and it got too dry or too lumpy to eat.  The best is to add a few walnuts on top and keep it as simple as it is.  Nice to go along with a cuppa and it really remind me of the banana cake we had in Hong Kong.

I took this freshly baked cake to visit my neighbour for morning tea.  He was diagnosed with a very rare cancer and undergoing chemo. His taste buds were gone but he could taste the bananas of this cake.  I'm so pleased that he enjoyed my baking. It's only a little thing I could do to cheer him and his wife up. His wife had just recovered from cancer a few years ago and they decided to retire and enjoyed life a bit more. Unfortunately, bad luck has come along for them! Let's hope thing will get better for them after the treatments and God bless for them.
 

Simple Banana Cake

4 ripes bananas, mashed
1 1/2 cups plain flour
1/3 cup butter, melted
3/4 cup brown sugar
1 egg, beaten
1 tsp vanilla essence
1 tsp bicarbonate of soda
1/4-1/2 cup milk
a pinch of salt
3 walnuts (optional)

Method:

  1. Preheat the oven at 175c. Sift plain flour and bicarbonate of soda in a bowl.
  2. Combine butter, egg, sugar and vanilla in another bowl, add the mashed banana, milk, salt, then add the flour mixture.  Stir till well combined.
  3. Pour the mixture into a paper lined loaf tin. Top cake with three walnuts.  Bake for 45 minutes or until the skewer comes out clean after inserting into the cake.
Source: banana cake from Christine's Recipes


Thursday, February 21, 2013

Perfect Poached Eggs


On the Sunday Market, there usually a stall run by the local community group selling sausage in bread or bacon & egg burger for fundraising.  Egg is a cheap food with lots of nutrient.  We love a big breakfast which consists of egg, bacon, sausage, toasted bread with tomato and mushroom for brunch or lunch on a lazy Sunday.

I have to thank Julie Goodwin for her advice in her cookbook, Our family table on how to make perfect poached eggs as I have given up making poached eggs so long ago.  I think it's such a fuss playing with something so soft with hot water. She has a simple way to do to make a smooth egg with running yolk and if I'm not beware of my cholesterol, I could eat more than one egg! Opps!

Julie also mentioned that there are so many names for poached egg breakfast such as eggs Benedict is served with ham and English muffin in hollandaise sauce, eggs Royale is served with smoked salmon and eggs Florentine is served with spinach.  I prefer my poached eggs with bacon with low fat honey mustard sauce on toasted turkish bread. What about you?

Perfect Poached Eggs


  1. Pour water into a large non-stick deep pan till it is about 4cm of water (that would be enough to cover the egg), bring to the boil then lower the heat so the water is barely simmering. 
  2. Crack one egg gently on the side of the pan and carefully lower it into the water with a spatula.  Then leave the egg by itself as the egg will gather the bilk of its white to itself and don't worry about the stringy floaty bits.
  3. Crack another egg and do the same. Julie suggests you can cook 4 eggs at a time but I only do one or two at a time. You need to strain the water or replaced with fresh one after few batches.
  4. After 3 minutes or when the egg whites looks cook through, lift the egg out with a slotted spoon  and drain the excess water.  Slide them straight onto the serving plate.   


Friday, February 8, 2013

Last Minutes Almond Cookies for Chinese New Year (賀年杏仁餅)


Happy Chinese New Year!  If you are still busy preparing dinner for today but still want to make some homemade cookies to celebrate CNY, this is an easy recipe that don't need any cookies cutter, roasting and grounding nuts or jam making.  And I can tell you these last minutes cookies taste better than the one that needs lots of effort to prepare!

祝大家新春大吉,萬事如意

Chinese Almond Cookies (杏仁酥餅)
(make about 45)

120g almond meal
180g plain flour
60g caster sugar
60g icing sugar
1/4 teaspoon salt
1 teaspoon baking powder
1 teaspoon bicarbonate of soda
3/4 cup canola oil
beaten egg for brushing
almond flakes (optional)

Method:

  1. Preheat oven at 180c. Lined baking trays with baking paper. 
  2. Sift the flour, icing sugar, baking powder and bicarbonate of soda into the mixing bowl, add the almond meal, sugar and salt. Combine all the dry ingredients and make a well in the middle.  Gradually add oil to form a moist dough, add a little oil about 1 tablespoon at a time if needed until you shape into balls. 
  3. Roll cookies dough into small balls and press slightly with the back of a fork. Brush with egg and topped with almond flakes, then brush with more egg over.  Bake for 15-20 minutes.
Note: The original recipe uses 120g caster sugar, it works well as well if you don't want to use two different types of sugar.

Source: adopted and modified from The Kitchen 70's


Friday, February 1, 2013

Salted Caramel Fudge


 With Chinese New Year around the corner (Feb 10), people that celebrate this biggest festival would be busy cleaning their houses for visitors, prepare delicious food for family and friends or planning a special trip for a holiday.  To try to keep the Chinese tradition, I would prepare a candy tray at home for the visitors and make some cookies as gifts.  Then there would be a special dinner on the New Year's Eve.  Kids are looking forward to receive the red pockets filled with money given from the seniors.  Chinese candy are dried and preserved fruit & nuts such as sweeten coconut, lotus seeds, pineapple and winter melon.  My westernised candy tray usually filled with kids favourite from the lollies and chocolate in the supermarket.

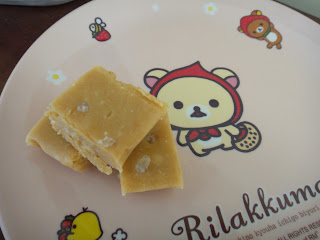
Since I like fudge but never make it before, I think this would be something nice to put into my candy tray or wrap up as a gift.  My husband takes them to work and people already giving it a thumb up!  If you love something sweet, especially salted caramel, you'd love this recipe!  You can omit the salt to make it as plain caramel instead.

Salted Caramel Fudge

I can condensed milk
1 cup less 2 tablespoons brown sugar
125g butter
2 tablespoons glucose syrup

(put later)
100g white chocolate bits
1/3 teaspoon rock salt

Method:
Put all ingredients except the chocolate and salt in a microwave safe bowl.  Cook on high for 6 minutes,  stir, then cook again for 2 more minutes till thick and golden.  Remove from heat then add the white chocolate.  Stir till all the chocolate is melted.  Pour into a square pan and stand for 1 minute before sprinkle with rock salt.  Set aside till set and cut with a warm knife.


Friday, January 25, 2013

Lamb Kebabs for the Australia Day


It wouldn't go wrong to celebrate Australia Day with this lamb kebabs on the BBQ.  One time I asked a visiting student from China who has spent a few days with the Australian family that what was the most memorable time she had in Australia.  Her answer was the BBQ!  The great thing of BBQ is that you throw in all sort of different things such as sausages, chops or prawns onto the BBQ and you talk and drink while cooking the food.  The atmosphere is relaxing and food are cooked to your liking.  And lamb, I would say it's the number one red meat that Aussie love!

Have a lovely Australia Day!

Lamb Kebabs
(make about 10)

500g trimmed lamb, cubed
mushroom, halves
onions, cubed
skewers

Marinade:
1 tablespoon paprika
1/2 teaspoon cumin seeds
2 teaspoons coriander seeds
2 tablespoons soy sauce
1/2 teaspoon garlic mince
cracked black pepper

Method:
Marinate the meat with the marinade for at least an hour.  Spike each piece of meat alternatively with onion and mushroom (or capsicum). Pan fry it in the grill pan or on the BBQ, turing regularly till you get a nicely charred meat on the outside with juicy pink on the inside.

Source: adopted & modified rom the cookbook "jamie's kitchen" from Jamie Oliver.

Saturday, January 19, 2013

Japanese Melon Bun (日式蜜瓜包)


This Japanese melon bun is similar to Hong Kong's pineapple bun (香港菠蘿包), only it has a fair looking as it does not glaze with egg before baking.  The cookie dough topping is not as flaky as the HK pineapple bun.  And the texture is firmer and a little floury but it still very good after it has been a few days old.  It is sometimes labelled as Japanese pineapple bun in some bakery.  The name of the melon bun is derived from the rough cracking look of the cookie dough.  The joy of eating this bun is liked having a milk bun topped with a soft cookie.  And I really think it tastes like the Chinese's giant cookies (光酥餅). I have doubled the recipes to make 12 buns using the bread machine. If you want to watch the video kneading the bread by hand, please click here.


Japanese Melon Bun (日式蜜瓜包)
(make 12)

For the bread dough:
2 tablespoons egg
140ml milk
30g butter
70g sugar
1/2 teaspoon salt
280g bread flour
6g dried yeast

For the cookie dough topping:
50g butter
70g sugar
50g egg
160g plain flour
1/2 teaspoon baking powder

Method:

  1. Following the sequence of the order from the bread dough, putting the ingredients into the bread machine, starting from the liquid and putting the yeast last.
  2. Press the "dough" button.  When it is ready, punch down to release excess air.  Sprinkle some flour on the workbench and knead till the dough is smooth and not sticky.  Divide the dough into 12 equal sized portions about 45g each.  Make into bun shape and put onto 2 paper lined baking trays.  Let it rest in a warm place (a warm oven) for about 45minutes or until it is double in size.
  3. Meanwhile, prepare the cookie dough, mix the flour, baking powder and sugar together.  Make a well in the middle, add the egg and mix well.  Add the butter and knead till a soft dough form.  Keep in the fridge for about 30 minutes.
  4. Divide the cookie dough into 12 portions. Roll into round flat shape with a roller, then lay on top to cover the bun.  Use a knife to mark a criss-cross patten on top. Let it rest in a warm place for another 30 minutes.
  5. Bake in a preheated oven at 180c for about 15 minutes.


Saturday, January 12, 2013

Asian Style Iced Milk Tea (中式凍奶茶)


What does summer mean to you? Hot, lazy or nothing grow in the garden?  We start the beginning of the year in the middle of summer and we have been having long hot summer this year with the temperature over 30c most of the days.  Since it has been so dry with no rain, bushfire is happening in many places.  You just want to hide yourself in the shade most of the time.  Sitting at the veranda relaxing, I enjoy this refreshing iced milk tea to help to ease the heat.  This is the type of tea you'll get at asian cafe using condensed milk and evaporated milk instead of fresh milk.  Some people like to mix the tea with coffee and called it yuen-yang (鴛鴦), a bit like the mocha only it is a mix of coffee and chocolate.

Asian Style Iced Milk Tea
(make 1 tall glass)

Put hot water into a mug about 2/3 full with a ceylon tea bag.  Let it rests till the tea is cool down a little and fully infused.  Pour 1 1/2 tablespoon of condensed milk and 1 tablespoon of evaporated milk into a tall glass, add the tea and stir till well combined.  Fill another tall glass with ice and pour the tea into the other glass and serve immediately.  Enjoy!


Friday, January 4, 2013

Chinese Style Mango Pudding (eggless)


Living in Australia, we always have mangoes for every Christmas.  My husband would buy a whole tray of mangoes and the Bowen (Kensington) mango is my favourite as it is sweet with no fibre in the flesh.  When I was about 9 or 10 years old while living in Hong Kong, I tried to open the seed of the mango thinking there would be something fantastic inside since the flesh of mango tasted so nice.  Of course, I found nothing interesting there but every summer we would enjoy at least a whole tray of mangoes.

When I went to Yum Cha in Sydney, the waitress was pushing the food trolly with mango pudding and mango crepes around the tables.  Mango is a really nice fruit to make into dessert.  I like this pudding recipe from Christine's Recipes as it is eggless and light.  After all the big feast we had from Christmas, this is a simple and nice dessert to have for the hot summer!  With the summer holiday having kids at home, why not get them to help making this yummy dessert? 

Chinese Style Mango Pudding (eggless)
(make 4)

1 packet of 85g mango flavour jelly crystal
90ml milk
40ml evaporated milk
110ml hot water
55ml cold water (boiled)
2 large mangoes

Method:

  1. Dissolve the jelly crystal with the hot water, then add the cold water.  Stir in the milk and the evaporated milk.
  2. Pour the jelly mixture into four glasses.  
  3. Cut one of the mangoes into cubes and add into the jelly mixture.  Keep into the fridge for 2-3 hours or until the pudding is set.
  4. Cut the remaining mango into cubes and add to the pudding before serving.
As this dessert is not very sweet, it is best to consume as it is.  I have tried to serve it with ice-cream, the sweetness of ice-cream covers the taste of mango which is not a recommended combination.