Friday, July 31, 2015

2015 is the Year of Celebration! Let's celebrate with a high tea with my 5th Year of Blogging!


There are a lot of things to celebration this year. Earlier this year, my husband and I celebrated our 20th Wedding Anniversary. It was a big milestone for my husband and I that we had been going through so much especially the past 5 years. We had become a better couple and learnt from each other and I hoped we would have many more years of happiness to come.

This is the dessert we have at the anniversary. It's called "Death by Chocolate"


Then not long ago, our first child turns 18. It was so nice to have her to come home to celebrate with us. At this age, she could choose to have party with friends and she was also in the middle of busy uni life and I'm grateful that I could sing "Happy Birthday" to her and spend a lovely weekend with her.

This is a 3 layer nicked cake with the flavour of white choice, dark choc and strawberry

My mother is also turning 70 this year! She is a hard working woman and a very devoted wife. My mother has taught me a lot and she has been a role model for me to be a good wife and a caring mother. I wish her good health and enjoy her golden years with lots of love.

Mum's Birthday Cake

So here is July, the celebration of my 5th years of blogging and 5 years survival of my first cancer.  This blog helps me to going through the tough time and allowing me to meet many talents people that love cooking. It is also a memory keepsake for me to explore different types of cooking. Although I always get trapped by cakes recipes, I am a happier cook for good health and for the happy soul.

It would be great to have a high tea for celebration to thanks for your support!

1st layer Baklava and Berry Sponge Cupcakes


2nd layer - Chicken & Salad Wrap and Honey Roast Almond & Fig Tart


I don't believe every journey should have an end but it does need a rest sometime for reflection or branch out for other interests. There are many reasons for me to take a rest, a possible of 2 -3 years, as I want to enjoy my time with my kids and support them before they advance into the big big world. I want to practise more yoga and exercise to keep a healthy mind and body and honestly I just want to eat the food and not thinking of taking picture of it. However I'm not gone, I will still read your post and keep in touch sometime! So keep blogging!

I will be posting picture at Instagram (veronsnapshot) and my personal blog at Facebook (Veronica's Kitchen) regularly and you can follow me there to keep in touch.

3rd layer - assorted sandwich and egg & tomato tart


Thank You for the friendship and support over the years!


Sunday High Tea
 (the Baklava and egg & tomato tart are repost)
1st Layer

Baklava
Make 6 pieces

Ingredients:
15 sheets filo pastry (about 23cmx23cm), thawed
2-3 tablespoons of butter, melted
1 cup walnut, finely chopped
3/4 teaspoon cinnamon
2 tablespoons sugar

Honey-lemon Syrup:
1/4 cup sugar
1/4 cup water
2 tablespoons lemon juice
2 tablespoons honey

Methods:

1.     Line the non-stick baking paper onto the tray.  This will be your working station.
2.     Place the first sheet of pastry onto the tray.  Brushing it with melted butter.  The filo pastry I have is about 23cmx46cm, I cut it in half and work on the square shape.
3.     Repeat the brushing process for each layer of pastry.  Filo pastry is as fine as rice paper.  Try to patch it if it breaks rather than throwing the whole sheet away.  You don't notice it in the end product.
4.     Combine walnuts, cinnamon and sugar, sprinkle evenly over top layer. 
5.     Fold the two ends of the pastry toward the middle.  Then fold it again so you have one end stacking on top of the other like a roll.  Brush the top and side of the roll with butter.
6.     Bake in the pre-heat oven at 170C for about 30 minutes or until crisp and golden brown.
7.     For the syrup: Combine sugar and water in a small saucepan pan, stir over low heat until sugar has dissolved.  Add in lemon juice and honey and boil until the syrup starts to thicken.
8.     Trim the end of the roll, then cut the roll into 2cm thick pieces. Drizzle hot syrup over the Baklava.

Berry Sponge Cupcakes
(make 12)

Cupcakes
3 eggs
½ cup caster sugar
1/2 cup Lighthouse Cake, Sponge & Steamed Bun Self Raising flour, shifted
200g cornflour, sifted
20g butter, softened
1/4 cup boiling water

Buttercream Icing:
20g butter, softened
2 tablespoons berry jam
1 cup icing sugar, sifted

Method:
1.     Preheat oven to 180c. Fill a baking tray with mini cupcake cases.
2.     Beat egg until thick and creamy, add sugar and fold in flour, butter and water.
3.     Pour into cases and bake for 15-18 minutes.
4.     Meanwhile, beat butter, jam and icing sugar until light and fluffy.
5.     Decorate cooled cake with icing and place a fresh blueberry in the middle of each cupcake.

2nd Layer

Chicken and Salad Warp

1 piece of warp
cooked chicken
salad of your choice
Aioli sauce

Place chicken, salad and drizzle sauce over the wrap. Roll up and cut into 4-5 pieces and each piece with a toothpick.

Honey Roasted Almond & Fig Tart
(make 4 x 11cm tartlets)

250g shortcrust pastry (you can make your own or use the frozen one)
4 figs, stalks trimmed
zest of 1/2 orange and juice
1/2 tablespoon honey
100g butter, softened
100g sugar
100g almond meal
1 egg yolks

Method:
1.     Preheat oven 180c.
2.     Roll out the pastry over the tart cases, place a piece of baking paper over and ceramic beans over each and blind bake for 15 minutes then remove the beans and bake for another 5 minutes.
3.     Cut figs halve lengthways and mix with honey and orange juice. Roast 10-12 minutes at 180c till soft, Drain and reserve the juice.
4.     Cream butter and sugar till smooth and pale. Add in almond and zest, then yolk and I ½ tablespoon of fig juice.
5.     Pour the filling into the tart cases, Press the figs cut side up into the centre and bake for about 45 minutes at 150c. The centre will be a little gooey. Leave for 15 minutes before removing tin.
6.     Boil remaining juice and simmer till sticky and pour over the tart.

3rd Layer

Assorted Sandwiches

Egg and Bacon, Egg and Mayo, Cucumber and Mayo

Egg and Tomato Tarts
(make 4)

Ingredients:
4 eggs
2 bacon rashers, cut the shortcut bit into small pieces and use the rinds to roll up pineapple pieces OR
2 shortcut bacon, cut into small pieces
filo pastry, about 15cmx15cm
baby spinach leaves
4 cherry tomatos, halves
1 tablespoon red onion, finely chopped
oil

Method:

1.     Preheat the oven to 180c.  Grease the muffin cups with oil.
2.     Lightly pan-fried the bacon, leave aside.
3.     Place 3 sheets of pastry into the muffin tin, brush with oil. Repeat the process two more times until the tin is well covered.
4.      Line the pastry cases with few spinach leaves, place the tomato cut side up, add some bacon pieces and chopped onions.  Carefully break an egg into the case.  If you are using a muffin tray, fill the unused hole with water.

5.     Bake for 20 minutes or until the egg white has set.  Use a knife to lift up the tart and stand for 5 minutes before serving.

Saturday, July 25, 2015

Orange Poppy Seeds Syrup Cake

Orange Poppy Seeds Cake


My daughter made us this cake 5 years ago when I had my first chemo and I didn't want to bake anymore cake or cookies. I was very afraid of food for a while, wondering what caused me to have cancer. It could be food, stress, life style or genetic reason. All the organic food I had been having seemed not helping me. Then I had my 2nd cancer, it could be something brought up with the 1st cancer or I was just having more bad luck. I became very afraid of eating of meat protein.

So after 5 years, I really don't want to find out why or be afraid of having cancer.  Happiness is the main thing for me to live to the fullness and a good balance diet and exercise is the best way to avoid further sickness. Life could be very short and the love one could be gone in anytime, the main thing is to treasure every single day, every little thing that makes you smile and feeling grateful.

Don't be afraid of any food that you enjoy to eat as long as you are having a balanced diet!

Ingredients:

125g butter
3/4 cup castor sugar
zest of 1 orange
2 eggs
1 1/2 cups self raising flour
1/2 cup milk
1/4 cup poppy seeds

For the syrup:
1/2 cup orange juice
1/2 cup castor sugar

Method:


  1. Soak poppy seeds with milk for 1/2 hour.
  2. Cream butter, sugar and zest until light and fluffy. Add in eggs, mix well. Fold in flour, milk and poppy seeds mixture and stir till well mixed.
  3. Spoon batter into a 22cm paper line cake tin.  Bake in a preheated oven at 180c for about 40 minutes or when a skewer inserted in the centre comes out clean.
  4. Heat orange juice and sugar in a small saucepan until sugar dissolved. Let it boil for a little until syrupy. Pour hot syrup over hot cake. The cake will absorb the syrup an hour or two.  


Saturday, July 18, 2015

Sweet Potato Soup with Homemade Herb Butter Toasts


With the lowest temperature around 4c to 7c this week, it would be nice to snuggle in and enjoying a warm bowl of soup. This soup is similar to pumpkin soup. I had it in a French restaurant where the owner came from the Bresse region. The whole place is decorated with chicken that Bresse is famous for.  I like the flavour of the sweet potato with the addition of cream served with herb butter toasts. This could be a light meal for my vegetarian day or a nice entree to serve before the main meal.


Sweet Potato Soup with Homemade Herb Butter Toasts

Ingredients:

1 large sweet potato
4 medium washed potatoes
1/4 of a small onion
2 cups water
1/4 cup light cream
Salt and pepper to taste
Italian parsley to sprinkle

For the herb butter
250g butter, softened
4 tablespoons chopped Italian parsley

Method:

Mix the butter with the parsley till combined. Lay a piece of glad wrap onto the kitchen bench and add the butter mixture on top. Roll the butter mixture into a sausage shape and tighten the ends. Fridge until harden and slice into discs. Left over can be frozen until ready to be used.


Peel the potatoes and cut into chucks. Boil the potatoes and onion with 2 cups water until cooked. Leave cool a little.

Reserve half of the water. Blend the soup till smooth and return to the pan. Add the reserve  water bit by bit and add the cream to the soup until it has a smooth consistency. Seasoned with 
        salt and pepper. Sprinkle with parsley and serve with herb butter toasts.

 Cut 1/2 of the french stick into 3 cm thick, Place 1/2 of the butter disc on each bread. Place them
        into a hot grill until golden. (It shouldn't take too long to grill, so don't leave your grill)

Enjoy!


Monday, July 6, 2015

Berries and Coconut Muffins and Apple and Muesli Muffins


I have a collection of muffin recipes and this is my favourite one so far. Adopted from the cookbook " coming home" by Cathy Armstrong, these muffins are moist and delicious. Image holding them in your hands on a cold winter day, it's just so satisfying. Enjoy!

Berries and Coconut Muffins and Green Apple and Muesli Muffins
(make 12)

Ingredients:

2 1/2 cup self raising flour
3/4 cup castor sugar
3/4 cup desiccated coconut
100g butter, melted
1 1/2 cups milk
3/4 cup plain yoghurt
1 teaspoon vanilla essence

For the berries muffins:
1/2 punnet of strawberry
1/2 punnet of blueberry
icing sugar for dusting

For the apple and muesli muffins:
1 to 2 green apples, peel, cored and cut into pieces
1/4 teaspoon ground cinnamon
toasted muesli for sprinkle

Method:

  1. Mix the dry ingredients together. Then add in butter, milk, yoghurt and vanilla. Stir a little and add the berries till just come together.  
  2. Divide the batter into two lots. One with berries and one with apple and cinnamon. Spoon batter into muffin cases. Sprinkle muesli over the apple muffins and bake for 30-35 minutes at 190c.
  3. When the muffins are cooled, dust with icing sugar for the berries one.
Source: Adopted and modified from the cookbook "Coming Home" by Cathy Armstrong


Saturday, June 27, 2015

Rose Apple and Apple Crumble Tartlets


I would say apple is one of the best winter dessert. They are never too sweet and is always so satisfying. Cooked apple is also easier to digest and contains good fibre.

This rose apple is quick and easy to make and looks as pretty as a real rose. It's an ideal food for the last minute entertainment.

For the apple crumble, I got the idea making it after seeing it selling at the local bakery. When my son had it, he asked if they were the frozen apple tarts from the supermarket. Oh, yes and no, I use the ready made frozen tart cases and make the filling using fresh apples. They are also a good snack to have anytime of the day.

Thanks for the new "like" at my Facebook page! Have a good weekend!

Rose Apple
(make about 11)

3 Fuji apples
2 sheets of puff pastry
2-3 tablespoons apricot jam
1 -2 tablespoons water
2 tablespoons lemon juice
ground cinnamon


Method:

  1. Cut the apple into halves. Use a knife to remove the core. Then slice vertically into thin slices.
  2. Place the apple into a microwavable bowl, add the lemon juice and water nearly cover the top. Microwave for about 3 minutes then another 2-3 minutes or until the apple is soft enough to roll up but not over cooked. Then drain the apple.
  3. Mix the jam with water and microwave for 30 seconds.
  4. Cut each sheet of pastry into 5-6 portions. 5 would be easier the roll up. Spread with some jam then lay the apple slice slightly above the top edge (about 1cm) with the skin side facing up. 
  5. Overlapping each piece, sprinkle with cinnamon then fold the bottom pastry upward and roll up the rose starting from the left to the right. Place them into a greased 12 holes muffin tray. Repeat the process until you finish all the pastry.
  6. Bake in a pre-heated oven at 190c for 25 minutes or until the pastry turns golden.


Apple Crumble Tarlets
(make 4)

4 ready made frozen tartlet cases
1 green apple
1 teaspoon sugar

for the crumble:
2 tablespoons plain flour
2 tablespoons brown sugar
2 tablespoons butter

Method:

  1. Peel, cored and cut apple into small chuck.  Cook in a small saucepan with 1/2 cup water.  Cook until the water evaporated, add sugar and stir well.
  2. Put the flour and sugar into another bowl. Rub into butter until resemble crumb.
  3. Spoon the apple into cases, then sprinkle with the crumb.
  4. Cook in a pre-heated oven at 180c for about 15-20 minutes until the topping turns golden.

Thursday, June 18, 2015

Key Lime Pie


I always want to make this pie after seeing many bloggers making it. We couldn't get any key lime in Australia so I am using the green lime we have. When I made this pie, my son just declared that he would not eat it because lime is not his usual diet. My teenage boy always give me harsh comment these days. However, after taking a piece, he came back for a bigger piece and this had become one of his favourite dessert.

It really is a very easy dessert and now I understand why it's so popular!

Key Lime Pie

Ingredients:
150g McVite's digestive biscuits
25g butter, melted
4 egg yolks
395g can condensed milk
1/2 cup lime juice (about 3 limes)
1 tablespoon  lime zest

Method:

  1. Process biscuits until crumble in a food processor. Add melted butter and mix through. Press into a pie dish.
  2. Preheat oven at 160c and bake the base for 10 minutes. Cool.
  3. Add the egg yolks and lime zest into a bowl, whisk till egg is light and creamy. Stir in condensed milk and lime juice, whisk until well combined.
  4. Pour the filling over the pie base. Bake for 12 minutes at 160c or until the filling is just set. Fridge for 3 hours before serving.
Source: adopted and modified from http://www.taste.com.au/recipes/27475/key+lime+pie


Saturday, June 13, 2015

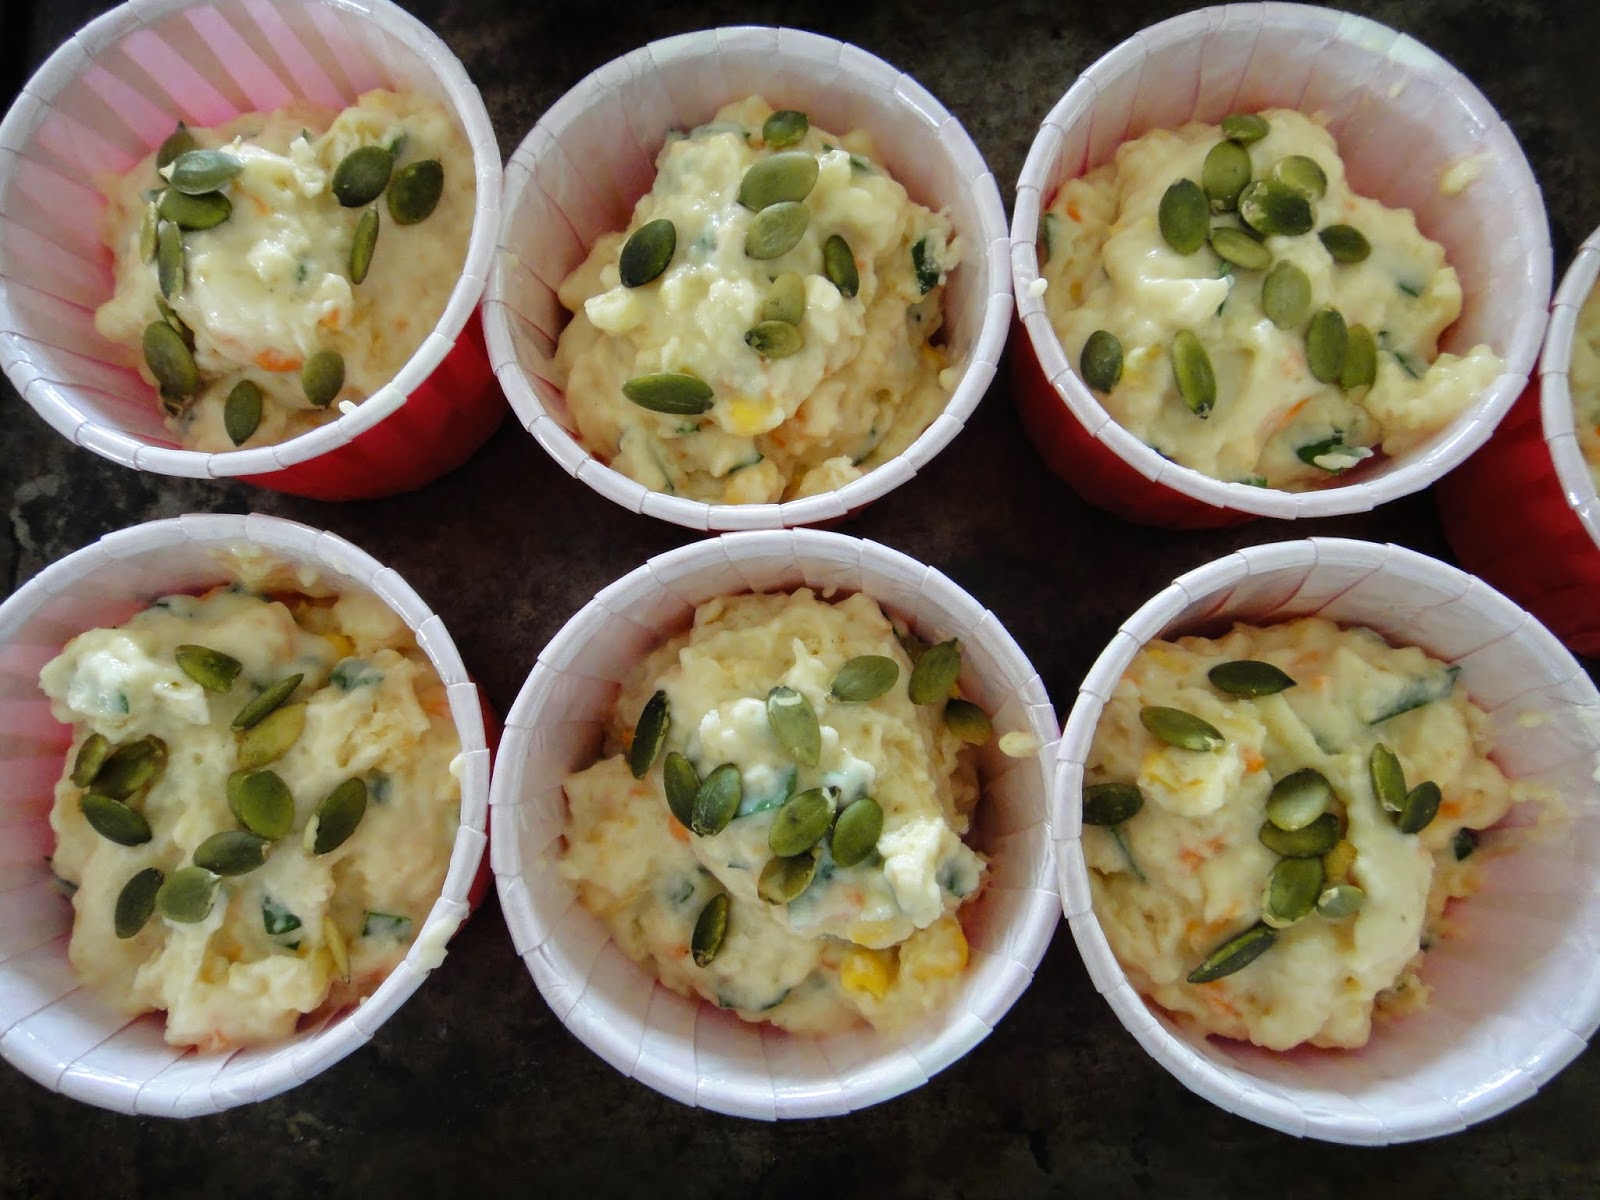
Corn, Carrot and Chive Savoury Muffins

Corn, Carrot and Chive Savoury Muffins


If you love savoury muffin, you would love to hold one of these warm muffin in your hands during the cold winter. These are the no guilt muffins which have only little sugar and oil. Maybe you can add some bacon to enhance the flavour. They also freeze well in the freezer. Enjoy!

Have a good weekend!


Ingredients:

265g plain flour
1 tablespoon baking powder
2 tablespoons sugar
1/4 teaspoon ground coriander
pinch of salt

240ml milk
3 tablespoons oil
1 egg, beaten

1/4 cup chives, chopped
1/4 cup corn kernels
1/4 cup carrot, grated
1/2 grated cheese
pepita seeds for sprinkle

 Method:

  1. Mix the dry ingredients and the cheese and vegetables in a bowl. In a large bowl combine milk, oil and egg. Whisk until well combined.
  2. Fold the flour and vegetable mixture into the milk mixture until nearly combined. Do not over stir.
  3. Spoon the batter into the muffin cases and sprinkle some seeds over the top. Bake for 20 minutes.


Friday, June 5, 2015

Red Lentils & Sweet Potatoes Dahl


I hope you love Indian food as much as I do. I always feel very excited when I smell the spice and herbs tossing in the pan. This dahl is ideal to serve with curry and rice with roti as I like to substitute some plant protein for animal protein these days. Sweet potato is low GI and turmeric is good for preventing cancer so this is a meal for anyone looking for good health.

It's long weekend of Queen's Birthday in Australia. Have a lovely weekend!

Red Lentils & Sweet Potatoes Dahl

Ingredients:
3 cups water
1 small sweet potatoes, peeled & cubed
1 tomato, diced
1/4 small onion
1/3 cup red lentils
1/4 teaspoon turmeric powder
salt to taste

Method:

  1. Rinse and drain the lentils. 
  2. Add a little oil and add the onion and turmeric. Then add water and the remaining ingredients. Simmer until the lentil and sweet potatoes are cooked.
  3. When the water evaporate and the dahl starts to thicken, seasoned with salt.  Serve with roti or rice.

Wednesday, May 27, 2015

Hokkien Prawn Noodle Soup with Homemade Egg Noodles


I always love noodle soup especially in winter and I would drink all the soup from the bowl. I love noodle soup from different Asian countries. As I grow up in Hong Kong, prawn wonton noodles soup is my most favourite soup. Then it would be Japanese ramen, Vietnamese pho, Thai Tom Yum seafood noodles soup.... After marrying my Malaysian husband, I discover more delicious noodles soup such as laksa, curry noodles, Ipoh chicken noodles soup to name a few and this Hokkien prawn noodles soup.

My mother-in-law gave me some of the Hokkine noodle paste from her last visit and I make it with some homemade noodles. It's a bit messy to make noodles but it's fun and rewarding. This noodles always goes well with Japanese Tonkasu ramen recipe.

Stay warm and happy cooking!

Hokkien Prawn Noodle Soup with Homemade Egg Noodles
(serve 2)

Ingredients:

For the soup:
1/2 pack 250g LN Little Nyonya Hokkien prawn noodle paste
6 cups water or chicken stock
1 chicken fillet cut into pieces
6 prawns, shelled
salt and pepper to taste

For the noodles:
1 1/2 cups bread flour or oo flour
3 egg yolks
1 egg
pinch of salt
1 tablespoon oil

To serve:
1 cup cooked rice vermicelli noodles
1 Boiled egg, boiled for 3 minutes
bean sprouts
Kung Kong (a type of Chinese veg that has a straw looking stem) or Chinese Chives

Method:

  1. Mix the flour and salt into a bowl, make a well in middle and add the eggs and yolk and oil. Knead till smooth, add a little water if it is still too dry. Fridge 10-15 minutes.
  2. Set up the pasta machine at the widest setting at 2nd setting. Divide the dough into half. Roll the dough over into thin pastry. Dust with flour to prevent sticking. Repeat with the other dough.
  3. Use an angel hair cutter to cut the pastry into noodles. toss in more flour.
  4. Boil noodles to al dente and refresh into cold water and drain well. 
  5. Place the egg noodles and rice vermicelli noodles into 2 large noodle bowls.
  6. Add water to a saucepan and 1/2 packet of the noodle paste and let it boil. Add the chicken pieces and seasoned with salt and pepper. Cook the prawns, bean sprouts and kung kong in the soup and use a ladle to put them onto the noodles. Pour hot soup over and garnish with half a boiled egg for each bowl. Enjoy!

Note: There is enough left over noodles to make 2 more serves or you can use it for stir fry noodles for another meal.


Saturday, March 21, 2015

Humming Bird Slices and Coconut & Almond Slices


I could not decide which slices I like the best between these two slices. I love the fruity flavour of the Humming Bird Slices but I also love the buttery, almond topping of the coconut slices. I always has the problem to choose, I could end up buying two paris of the same design shoes in different colours. So I decide to put a twin post again and let you to choose! They are both great recipes to bake on Sunday!

Humming Bird Slices

Ingredients:

100g butter, melted
1/2 cup brown sugar
1 cup self raising flour
1/3 cup desiccated coconut
2 eggs
1 cup fresh pineapple
1 banana, meshed
1/2 teaspoon ground cinnamon
1/2 cup roasted pecan, chopped, leave some for sprinkling

Icing:
Philly lemon cream cheese frosting

Method:

  1. Put all the dry ingredients into a mixing bowl, mix well.  Then stir in butter, fruit and nuts. 
  2. Stir till well combined and spread over a paper lined slice pan. Bake for 30-35 minutes at 180c.
  3. When the slice is cooled, spread the frosting evenly over and sprinkle some pecan nuts over the top.
  4. Keep in the fridge.


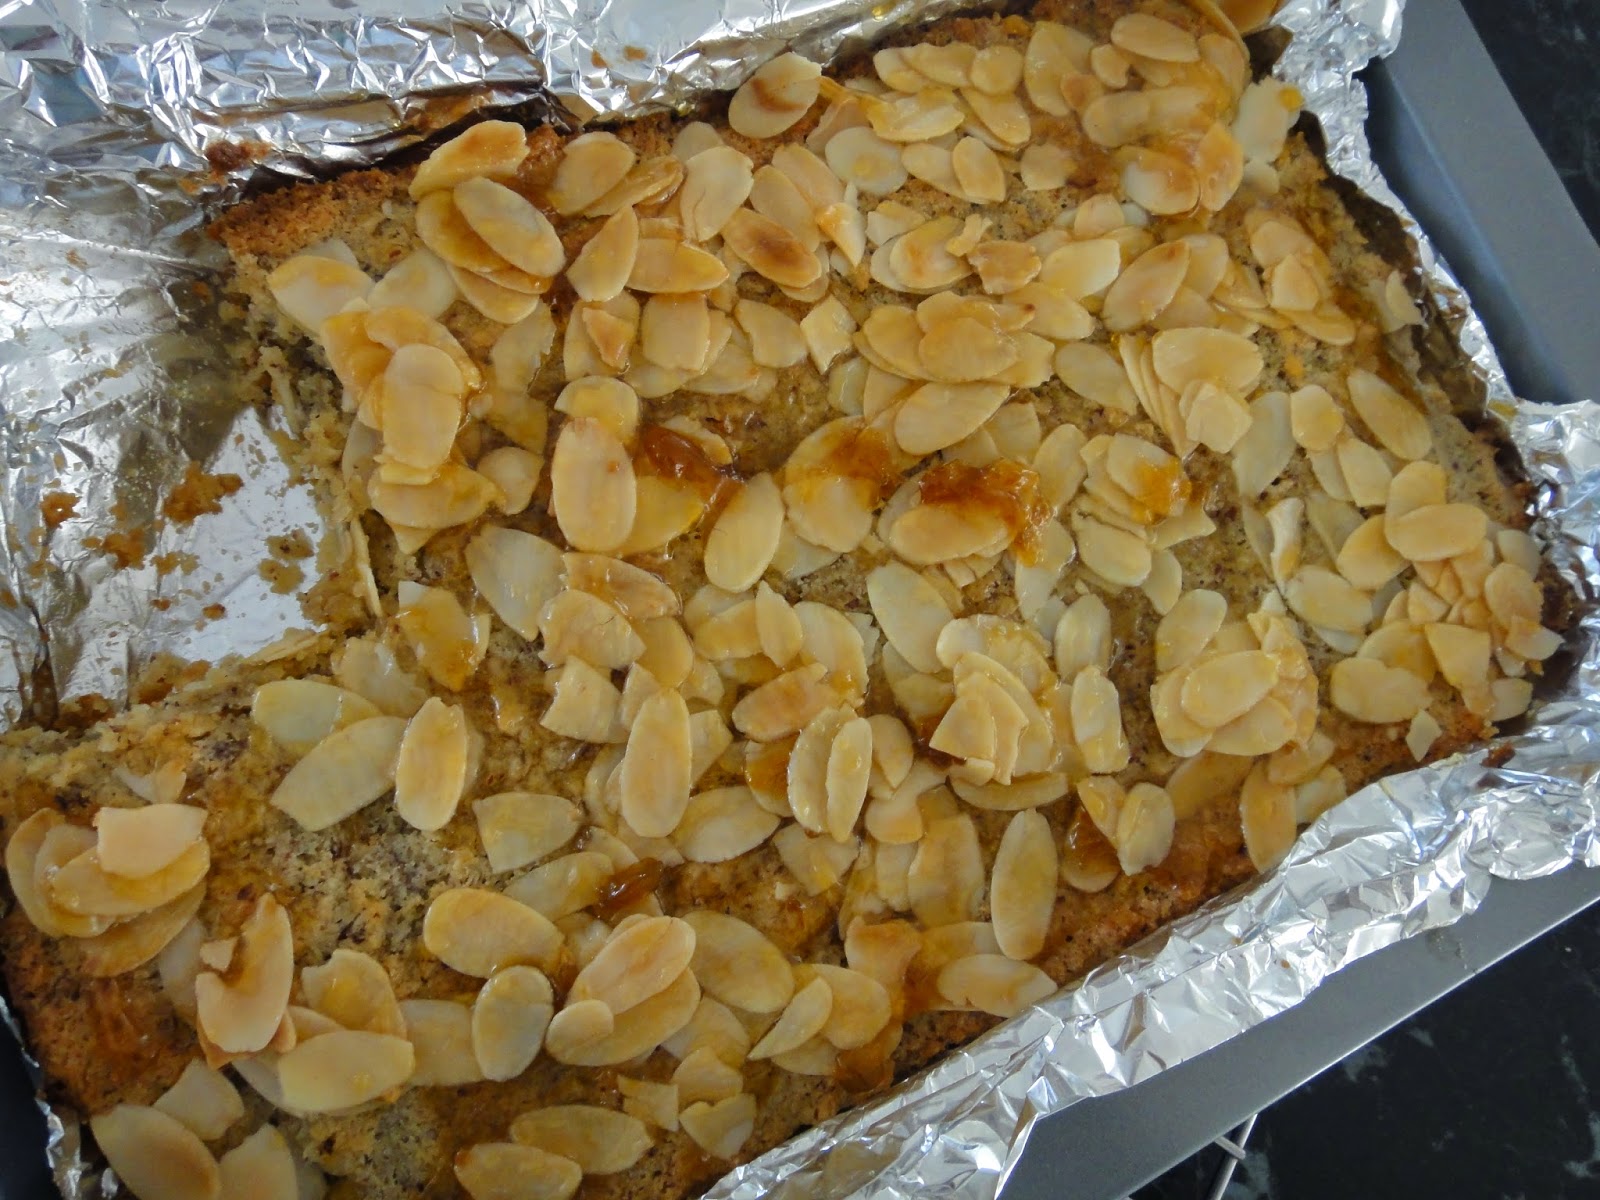
Coconut and Almond Slices

Ingredients:

For the base:
125g butter
1/4 cup caster sugar
1 cup plain flour
1/4 cup desiccated coconut
1 teaspoon vanilla essence

For the filling:
90g butter
1/3 cup castor sugar
2 eggs
1 cup desiccated coconut
1 cup almond meal
1/2 teaspoon orange rind

For the topping:
flaked almonds
warm apricot jam, for brushing

Method:

  1. Beat butter and sugar till creamy and add the flour, coconut and essence for the base.  Spread the base over a paper lined baking pan. Bake for 15 minutes at 180c.
  2. Meanwhile, prepare the filling. Beat butter and sugar till creamy.  Add in eggs one at a time.  Stir in the coconut, almond meal and orange rind till combined.
  3. Spread the filling over the hot base and sprinkle almond flakes over.  Bake for a further 15-18 minutes until the almond flakes turns golden. Brush the slice with hot apricot jam.
  4. Leave cool in pan before cutting into squares. Enjoy!

Saturday, March 7, 2015

Chinese BBQ Pork in Steamed Bun


After Cyclone Marcia hitting us making a big mess, Autumn is here! My little niece and nephew from Malaysia were overjoyed looking at the flood water and brown ocean as one of the highlight of their Aussie trip after staying at home for two days due to the bad weather. Our home became instantly so quiet after the visitors gone home. I am sure my little niece and nephew would have grown so much when I see them next time!

People were crowding at the street stall selling this bun at one of the night market I went to recently. Most of the people were enquiring rather than purchasing it. Maybe this is something new for them, a bit like a hamburger but not quite. The Chinese bun is steamed rather than baked. I actually like it more than the BBQ pork buns you get at Yum Cha. There is more pork and extra sauce and the vegetable making it a healthier option. You can substitute Chinese BBQ pork with Chinese roast duck for this recipe.

Chinese BBQ Pork in Steamed Bun

Ingredients:
Chinese BBQ pork, store bought or make your own
Chinese Steamed Buns, available at Chinese grocery store, I got them from Sunnybank Plaza
Hoisin sauce
Lettuce and Cucumber

Cut BBQ pork into thin slices, fill bun with layers of salad, top with BBQ pork then drizzle good amount of Hoisin sauce over. Enjoy!

Tuesday, February 17, 2015

Agar Agar Jelly Cake with Coconut and Pandan


Chinese New Year is coming up on 19 February. This year my in-laws from Malaysia is coming to spend CNY with us making it extra special. As usual for any Chinese celebration, there will be lots of cooking and eating. Agar Agar jelly is a popular sweet you would see in any Malaysian party. It is made from sea vegetable which is a good substitute for gelatine for vegetarian.  It also helps to create many colourful and healthy dessert. It is a great last minute dessert that is very simple to prepare.

I finally find the frozen pandan leaves from Yuen's Market at Sunnybank in Brisbane. I usually use the pandan essence which is very bright green in colour and taste not as good as the real one. I normally make this dessert using coconut milk, evaporated milk and mung bean.  As I don't want to over power the taste of the pandan, I have omitted the evaporate milk here. After discovering this Asian vanilla essence, surely there will be more pandan recipes to come. If mung bean is not your thing, you can omit it as well.

Have a great Chinese New Year!

Agar Agar Jelly Cake with Coconut and Panda

Ingredients:

A:
1/4 cup split mung beans or yellow split peas
1 cup water

B:
3 pandan leaves
1 cup boiled water at room temperature

C:
20g agar agar leaves
2 litres water
1 3/4 cup sugar or more to taste
1 1/2 cup coconut cream

Method:

  1. A: Cook mung beans with water till boil, turn down heat and simmer for 10 minutes or until the beans are cooked. Strain and put the bean aside.
  2. B: Cut the pandan leaves into pieces. Add into the blender with water and blend till the juice is green. Strain and preserve the water and discard the leaves.
  3. Place agar agar into boiling water and let it dissolves. Add sugar and stir till sugar dissolves.
  4. Pour about 1/3 of the agar agar sugar mixture into a large baking tray (25cmx30cm). Keep in fridge for about 15 minutes.
  5. Add coconut cream and pandan juice to the remaining agar agar sugar mixture. ( If not using pandan juice, you can add 1/4 cup evaporated milk here) Spread mung bean over the 1st layer of the cake. Then use a ladle to pour the coconut mixture into the tray.  Keep in fridge for at least 1 hour before cutting into slices. It is best to consume the jelly slices within one or two days.


Tuesday, February 10, 2015

Nutella Strawberry Shortcake


This is another great idea to celebrate Valentine's Day. As my family doesn't like cake decorated with whipped cream a lot. I choose to ice the cake with nutella and serve it with ice-cream. It could be one of the last minute dessert that looks like a lot of work has been done!

Nutella Strawberry Shortcake

Ingredients:
60g butter
2 tablespoons caster sugar
2 egg yolks
3/4 cup Lighthouse low-protein self-raising flour
1/3 cup milk
1 punnet strawberry
nutella
icing sugar for dusting

Method:

  1. Cream butter and sugar until light and fluffy, add egg yolks and beat well.  Add in sifted raising flour and milk until well mixed.
  2. Press dough into a lightly greased 20cm sandwich tin, bake in 180c for 15-20 minutes.
  3. Remove cake from tin and cool slightly. Spread with nutella and decorate with strawberries. Serve with cream or ice-cream.

Sunday, February 1, 2015

Oreo Cream Cheese Slices for Valentine's Day


There was a plan before making these yummy slices as Oreo usually doesn't last long in my pantry.  I bought two packets and hid them in a special corner until they were really to be used.  As you may know, none of my family like cheesecake and I am taking the risk of eating them all by myself.  But I have found my lovely son to be my Valentine to share them with me. What a joy!

Happy Valentine's Day! XO

Oreo Cream Cheese Slices

Ingredients:

For the base:
200g oreo cream biscuits
50g-60g butter, melted

For the filling:
150g oreo cream biscuits
250g cream cheese
65g sugar
300ml thickened cream, whipped
1 teaspoon vanilla essence
2 teaspoons gelatine
2 tablespoons of boiling water

For the decoration:
12 mini oreo cream biscuits
Method:

  1. Prepare a slice pan and lined with baking paper.
  2. Put the biscuits into the blender and blend till crumble. Add in butter and mix till moist. Press and spread the biscuits crumb into the pan and put into the fridge for at least half an hour.
  3. Dissolve gelatine with boiling water. Beat cream cheese with sugar, then add the vanilla essence, gelatine solution and whipped cream. Fold till all ingredients mixed well. Finally add the coarsely blended biscuits.
  4. Spread the filling over the base and chill for 3 hours before cutting into slices and decorated with mini oreo.

Thursday, January 22, 2015

Homemade Fruity Ice Blocks


Although summer is not my favourite season, I do love summer fruit the most. We had lots of cherries, berries and mango during Christmas. Followed by lychees and stone fruit over the rest of the  summer holidays. Not to mention the watermelon and the all year rounded banana and strawberries making you living in the paradise of fruit. My Malaysian hubby would probably say it's not good enough without Durian, the King of the Fruit. LOL!

The best way to keep seasoned fruit is to freeze them for later use. These homemade ice blocks are  truly healthy for a summer treat. The summer holiday is finishing soon and I hope everyone has a good break and ready for the fresh start of the school.

Have a great Australian Day!

Homemade Fruity Ice Blockes

Ingredients:

Apricot Nectars
Strawberries, sliced
Peaches or mango, cubed

Place the cut up fruit at the bottom of the ice block moulds. Fill with the apricot nectars then keep into the freezer till ready to eat.

Place the ready to eat ice blocks within the mould under running warm water will make it easier to remove the ice blocks from the mould.