Showing posts with label slices and cookies. Show all posts

Saturday, March 21, 2015

Humming Bird Slices and Coconut & Almond Slices


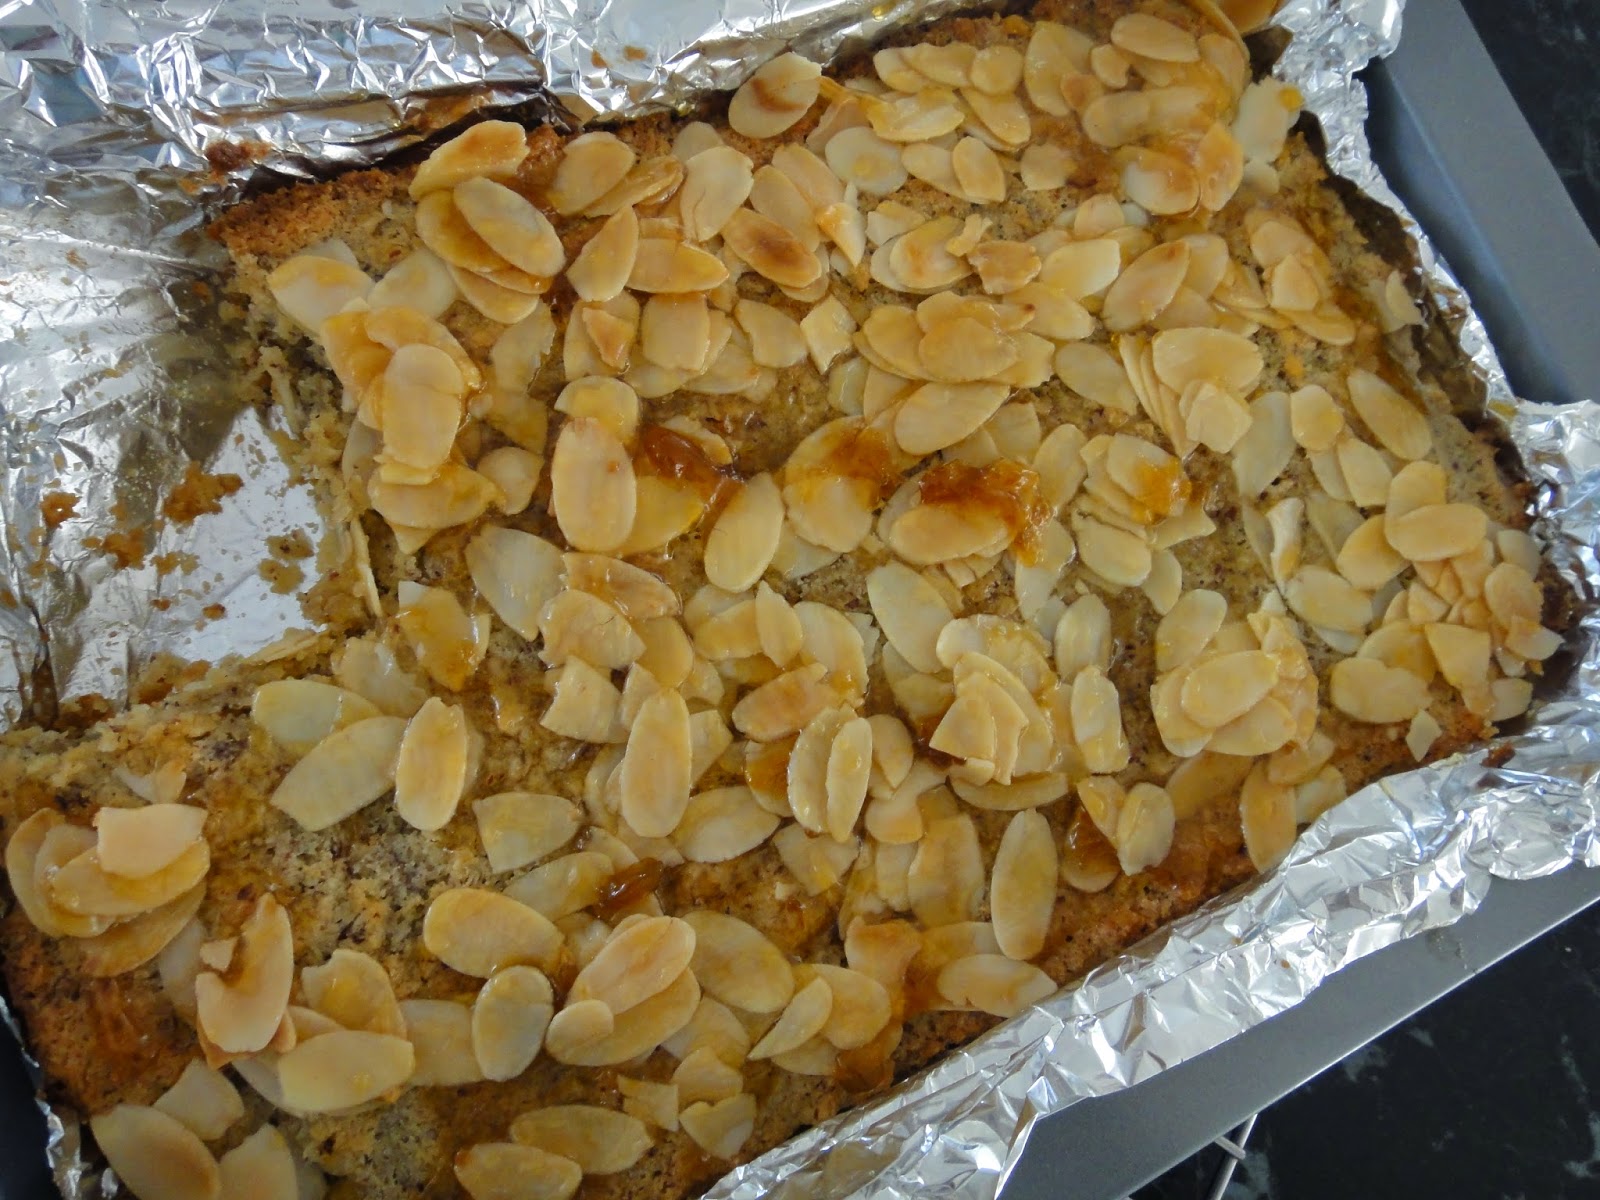
I could not decide which slices I like the best between these two slices. I love the fruity flavour of the Humming Bird Slices but I also love the buttery, almond topping of the coconut slices. I always has the problem to choose, I could end up buying two paris of the same design shoes in different colours. So I decide to put a twin post again and let you to choose! They are both great recipes to bake on Sunday!

Humming Bird Slices

Ingredients:

100g butter, melted
1/2 cup brown sugar
1 cup self raising flour
1/3 cup desiccated coconut
2 eggs
1 cup fresh pineapple
1 banana, meshed
1/2 teaspoon ground cinnamon
1/2 cup roasted pecan, chopped, leave some for sprinkling

Icing:
Philly lemon cream cheese frosting

Method:

  1. Put all the dry ingredients into a mixing bowl, mix well.  Then stir in butter, fruit and nuts. 
  2. Stir till well combined and spread over a paper lined slice pan. Bake for 30-35 minutes at 180c.
  3. When the slice is cooled, spread the frosting evenly over and sprinkle some pecan nuts over the top.
  4. Keep in the fridge.


Coconut and Almond Slices

Ingredients:

For the base:
125g butter
1/4 cup caster sugar
1 cup plain flour
1/4 cup desiccated coconut
1 teaspoon vanilla essence

For the filling:
90g butter
1/3 cup castor sugar
2 eggs
1 cup desiccated coconut
1 cup almond meal
1/2 teaspoon orange rind

For the topping:
flaked almonds
warm apricot jam, for brushing

Method:

  1. Beat butter and sugar till creamy and add the flour, coconut and essence for the base.  Spread the base over a paper lined baking pan. Bake for 15 minutes at 180c.
  2. Meanwhile, prepare the filling. Beat butter and sugar till creamy.  Add in eggs one at a time.  Stir in the coconut, almond meal and orange rind till combined.
  3. Spread the filling over the hot base and sprinkle almond flakes over.  Bake for a further 15-18 minutes until the almond flakes turns golden. Brush the slice with hot apricot jam.
  4. Leave cool in pan before cutting into squares. Enjoy!

Sunday, February 1, 2015

Oreo Cream Cheese Slices for Valentine's Day


There was a plan before making these yummy slices as Oreo usually doesn't last long in my pantry.  I bought two packets and hid them in a special corner until they were really to be used.  As you may know, none of my family like cheesecake and I am taking the risk of eating them all by myself.  But I have found my lovely son to be my Valentine to share them with me. What a joy!

Happy Valentine's Day! XO

Oreo Cream Cheese Slices

Ingredients:

For the base:
200g oreo cream biscuits
50g-60g butter, melted

For the filling:
150g oreo cream biscuits
250g cream cheese
65g sugar
300ml thickened cream, whipped
1 teaspoon vanilla essence
2 teaspoons gelatine
2 tablespoons of boiling water

For the decoration:
12 mini oreo cream biscuits
Method:

  1. Prepare a slice pan and lined with baking paper.
  2. Put the biscuits into the blender and blend till crumble. Add in butter and mix till moist. Press and spread the biscuits crumb into the pan and put into the fridge for at least half an hour.
  3. Dissolve gelatine with boiling water. Beat cream cheese with sugar, then add the vanilla essence, gelatine solution and whipped cream. Fold till all ingredients mixed well. Finally add the coarsely blended biscuits.
  4. Spread the filling over the base and chill for 3 hours before cutting into slices and decorated with mini oreo.

Sunday, June 23, 2013

Apple Slices


Besides the satisfaction of feeding the long queue of hungry kids, one of the good thing being a volunteer at the school tuckshop is to learn new recipe.  I first came across this apple slices through a funding raising event, it was the best slice for the day! It bet all the cupcakes and sweet tart. While the taste of this slice still fresh in my mind, I find it selling at our school tuckshop. It must be a very common slice but I have never seen it before. The two slices that I have are quite different (one not baked for the topping and the other baked with a sprinkle of cinnamon) and I prefer the first one I have at the fundraising.  After searching recipes from the internet and a bit of modification, this is what I make to my liking.  Crispy coconut, buttery base with the fresh taste of soft apple and custard cream topping with a hint of cinnamon.  What can you ask for more than that?
  
Apple Slice

Ingredients:

For the Base:
1 1/3 cups self-raising flour
2/3 cup caster sugar
1 cup desiccated coconut
125g butter, melted
1 teaspoon vanilla

For the filling:
2 1/2 large Granny Smith green apple
plus 2 tablespoons brown sugar
1/2 cup water

For the topping:
250g lite sour cream
1 egg, beaten
ground cinnamon

Method:

  1. Line a slice pan with baking paper.  Preheat oven to 180c.
  2. Mix the dry ingredients of the base into a mixing bowl, add in melted butter and vanilla till all mixed.  Add to the baking pan and press to flatten the base evenly.  Bake for 20 minutes.
  3. Peel, core and cut the apple into cubes.  Add the apple into a saucepan with water and sugar, bring it to the boil. Turn down to medium heat and simmer until the apple is cooked and the water nearly evaporated.
  4. Drain off excess water and spoon in the apple onto the base.
  5. Beat together the sour cream and egg, sprinkle with a little cinnamon.  Put the slice back to the oven and bake for another 15-20 minutes at 160c.
  6. Cool the slice in pan before cutting. This slice is best serve on the day of cooking.  


Friday, February 8, 2013

Last Minutes Almond Cookies for Chinese New Year (賀年杏仁餅)


Happy Chinese New Year!  If you are still busy preparing dinner for today but still want to make some homemade cookies to celebrate CNY, this is an easy recipe that don't need any cookies cutter, roasting and grounding nuts or jam making.  And I can tell you these last minutes cookies taste better than the one that needs lots of effort to prepare!

祝大家新春大吉,萬事如意

Chinese Almond Cookies (杏仁酥餅)
(make about 45)

120g almond meal
180g plain flour
60g caster sugar
60g icing sugar
1/4 teaspoon salt
1 teaspoon baking powder
1 teaspoon bicarbonate of soda
3/4 cup canola oil
beaten egg for brushing
almond flakes (optional)

Method:

  1. Preheat oven at 180c. Lined baking trays with baking paper. 
  2. Sift the flour, icing sugar, baking powder and bicarbonate of soda into the mixing bowl, add the almond meal, sugar and salt. Combine all the dry ingredients and make a well in the middle.  Gradually add oil to form a moist dough, add a little oil about 1 tablespoon at a time if needed until you shape into balls. 
  3. Roll cookies dough into small balls and press slightly with the back of a fork. Brush with egg and topped with almond flakes, then brush with more egg over.  Bake for 15-20 minutes.
Note: The original recipe uses 120g caster sugar, it works well as well if you don't want to use two different types of sugar.

Source: adopted and modified from The Kitchen 70's


Tuesday, July 17, 2012

Almond Jam Drops with Homemade Strawberry Jam


So it is time to make some jam as the market is filled with delicious and sweet strawberries.  My mother-in-law is visiting us later this year and she has ordered two bottles of jam already.  Jam is a good gift as it always taste better than the commercial one, and it's made with your heart but doesn't cost you heaps! I  have made a bottle of strawberry and another one with pineapple and passionfruit from my bread machine.  The passionfruit tree in our yard grow like grapes and I think I have collected more than fifty passionfruit so far.  That's another good reason to make jam with seasoned fruit so you can enjoy them a bit longer.  I will post the recipes of those jam in my next post.

I'd say I have a collection of quite a few yummy cookies recipes but I don't get a good one from jam drops.  Such a simple cookie but I always have problem with the recipe that the cookies are either too hard or too sloppy and most of the time the jam goes all over the cookies.  Here is my new found from Tana Ramsay's cookbook!  It is the best I have so far, it's chewy, rich in butter taste and the jam sits in the middle of the cookie liked a jewel.

Almond Jam Drops
(make about 35)

185g butter, softened
1 tsp vanilla essence
165g caster sugar
2 egg yolks
60g almond meals
1/2 tsp baking powder
strawberry jam

Method:

  1. Pre heat oven to 180c.  Line 2 baking tray with baking paper.
  2. Beat butter, vanilla and sugar until creamy and fluffy.  Beat in the egg yolks.  Fold in the sifted flour and baking powder, then almond meals.  Mix until all combined.
  3. Take a tablespoon of the dough and roll dough into a ball. Place onto baking tray and make a 1cm deep hollow with the end of a chopstick.
  4. Fill the cookies with jam and bake for 15-20 minutes until the cookies turn slightly brown.  Cool biscuits on a wire rack.
Source: Modified and adopted from the cookbook, "I Love to Bake" by Tana Ramsay. 


Saturday, May 5, 2012

Bus Driver's Mother-in-law's Almond Honey Slice


This recipe is given by the bus driver to the mother-in-law of the Australian food critic, Matt Preston during a country bus trip.  It's a recipe belonged to the bus driver's mother-in-law's.  Isn't it funny that recipe can be found from anyone at anywhere!  Matt has been hosting the Australian Master Chef and the 2012 Master Chef will be on TV tonight! Yay!

As most of the mother-in-law's recipes are good and so would be this one, too!  The slice was crumbly with a rich buttery, nutty taste.  It would be nice to share this with your mother or mother-in-law this Mother's Day for a special treat.

Have a Happy Mother's Day!

Almond Honey Slice

For the Base:
90g melted butter
1/2 cup firmly packed brown sugar
1 cup plain flour
1/2 cup ground almonds

For the Topping:
125g butter, chopped
1/2 cup honey
200g slivered almonds

Method:

  1. Preheat oven to 170c.
  2. Combine base ingredients and mix well.  Press into a 18cm x 32cm paper-lined lamington pan.
  3. Bake for 12 minutes or until lightly brown.  Meanwhile, prepare the topping.
  4. Combine butter and honey in a small saucepan and stir over low heat until butter is melted.  Simmer uncovered for about 3 minutes or until mixture is a light caramel colour.  Stir in nuts.
  5. Spread base with hot topping and bake for about 15 minutes or until golden brown.  Cool in tray before cut into shapes.   

 Source: adopted from the cookbook, "Baking,"edited by Kylie Walker.


Monday, January 16, 2012

Which Pineapple Tarts Would You Like? (百變鳳梨酥)


It all started when my sister was living in Melbourne and she sent me a box of Taiwanese Pineapple cookies (鳳梨酥).  It was in cube shape wrapped with golden paper.  The pastry is buttery and the filling is moist and sweet.  I restricted myself to eat one a day until they were all gone.  I can never find any pineapple cookies as good as those from where I live.  Then when I got marry, my mother-in-law brought some homemade pineapple tarts to serve our guests for the wedding.  I was surprised that the taste of the pineapple tarts (黃梨撻) were very similar to the Taiwanese's.  Later I found out that both Taiwanese and Malaysian make them for the Chinese New Year.  For those Fujianese living there,  pineapple sounds similar to prosperity (旺利) so that it is widely use for decoration as well as for celebration food.

Over the years, I have been searching for the best recipe for those cookies and I have found many interesting cooking method. My mother-in-law would grate the pineapple and cooked it till dry and glossy and one of my friend taught me a short-cut way to put the pineapple into the juicer, take the blended fruit (not the juice) and cooked as above.  However, I still think that pineapple cookies or tarts are hard to make especially if you're using homemade jam.  If the jam is too wet or burnt, then they won't be good.  It's also hard to keep them fresh as days old one will lost its flavour and started to go soggy.  Therefore, freshly baked one is the best!  And the store brought jam is easier to handle if you want me to tell you the truth! These cookies are filled with store brought jam brought from my mother-in-law.  I couldn't decide which shape I'm going to make so I make all the shape I've known.  They are all made from the same dough, same jam only with different shapes but I love them all. Which one would you like?


I'm going to post some tradition sweet treat for the Chinese New Year.  You are welcome to celebrate the event by sending a picture of your Chinese New Year cooking (sweet or savoury) with/without a link to veronicaskitchen@facebook.com. Then I will post all on 23rd January (Australian time). Blogger and non-blogger are both welcome.  Let's celebrate our biggest festival together!    


The pastry recipe is adopted from Forbidden Garden, please click here for her Chinese blog.

Pineapple Tarts (Cookies)
(make 44)

200g butter, soften
40g icing sugar
1 egg yolk
300g plain flour
25g custard flour
1/2 tsp salt
300g pineapple jam (I use store brought)

Method:

  1. Beat butter and sugar until pale, then add egg yolk and mix well.
  2. Then add flour, custard powder, salt and mix into a smooth dough.  Rest 20 minutes.
  3. Divide jam into balls about 10g each and divide dough into 15g each.  
  4. Flatten the dough into round and fill with jam.  Make into apple-shape with a clove on top, cube shape, pineapple shape or if you have the moulds, shape into flower and coil shape.  Brush with egg for the apple and pineapple shaped one before baking.
  5. Bake about 20 minutes at 180c or until golden brown.


Monday, January 9, 2012

Grandma's Peanut Cookie (花生餅)


After the 2012 New Year, I have another New Year to celebrate in 2 weeks.  The Year of Dragon for the Chinese New Year falls on the 23rd in January.  Although I have been living offshore for many years, we still keep our Chinese Tradition to celebrate the New Year such as having a good feast on New Year Eve, giving kids the red pockets (money pockets) and visiting and greeting our senior for good health and prosperity.  As my husband family comes from Malaysia, they celebrate a bit differently to the way I was brought up.  After all these years of learning his culture, I now celebrate the New Year with a combined culture.  These peanut cookies come from my husband's grandma that she used to make many New Year's treats and sold them at the shop. When my husband was a little kid, he used to help her a lot in the kitchen that made him now a chef.  These peanuts cookies are my favourite Chinese cookies.

For the next 2 weeks, I'm going to post some tradition sweet treat for the Chinese New Year.  You are welcome to celebrate the event by sending a picture of your Chinese New Year cooking (sweet or savoury) with/without a link to veronicaskitchen@facebook.com. Then I will post all on 23rd January (Australian time). Blogger and non-blogger are both welcome.  Let's celebrate our biggest festival together!    

Grandma's Peanut Cookies
(make about 27)

100g raw peanuts, roasted and finely ground
100g plain flour
30g icing sugar
30g caster sugar
1 teaspoon toasted sesame seeds
1/2 cup peanut oil
1 egg yok, for brushing

Method:
  1. Preheat oven to 175c. Line baking tray with baking paper.
  2. Comine the peanuts, flour, icing sugar in a large bowl.  Make a well in the centre and slowly pour in the oil and mix in a sticky dough.
  3. Shape cookies into small ball shape, lightly flatten and place a halved raw peanut on top.  Brush with egg.
  4. Bake for about 8 minutes or until it's golden brown.


Monday, November 21, 2011

Birthday Pizza Cookies


I made this pizza cookies for my son's birthday.  We invited a few of his friends for a sleep over party, we had pizza and pasta followed by these cookies.  The boys came to our house with big bags, not full of clothes but full of water guns and toy guns that they had so much fun playing that they don't need much of a sleep.  

This cookies is inspired by the Betty Crocker Cookie Book.  If you don't want to bake, you can use store bought sweet cookies then ice the cookies with frosting and decorate with some chocolate and lollies for small pizza.  It will be a crowd pleaser at any kids party!


Birthday Pizza Cookies

1/3 cup caster sugar
1/3 cup brown sugar
1/2 cup butter, soften
1 teaspoon vanilla essence
1 egg
2 cups plain flour
1 teaspoon baking powder
1/2 teaspoon salt

For the frosting:
100g dark chocolate
1 tablespoon butter
1/2 cup icing sugar
4 tablespoons or more milk

For decoration:
mini marshmallow
smarties
white chocolate, melted

Method:
  1. Preheat oven at 180c.  Beat sugar, butter, vanilla together until creamy.  Add egg and stir in flour and baking powder.  Cover the dough with plastic wrap and refrigerate until firm.
  2. Roll dough to the base of the pizza pan or shape dough into small round shape for small pizza.  Bake about 30 minutes or until the cookies is golden brown.  Cool cookies at wire rack.
  3. For the frosting: melt chocolate and butter in a small saucepan under low heat.  Add in sugar and enough milk to make a smooth paste.
  4. Use a knife to spread frosting to cool cookies.  Then top with marshmallow and smarties.  Drizzle cookies with melted white chocolate.  Keep cookies in tin to retain freshness.


Wednesday, November 9, 2011

Almond Crisps


I had the draft of this cookies in my blog for a while, I actually made this in winter when it is was cold and the butter took so long to soften.  I ended up beating it with sugar in a double boiler with hot water to speed up the process.  It is really buttery and crispy like the Danish cookies and it is a perfect thing to go along with a cup of tea.  When I was living in Hong Kong, our relatives usually give us tins of Danish Cookies for Chinese New Year.  And in Australia, those Danish cookies can only be seen around Christmas time.  There are about 7 weeks to Christmas and 3 more weeks for the school ended for a long summer holiday.  With the preparation for Christmas and end of the year activities at school, life couldn't be busier at this time of the year! 
   
Almond Crisps


Ingredients:
125g butter, softened
1/4 cup caster sugar
1 cup self-raising flour
1/4 cup almond meal
2 tablespoons flaked almonds

Method:

  1. Preheat oven to 200c/180c fan-forced.  Line baking tin with baking paper.
  2. Beat butter and sugar in a mixing bowl with electric mixer until smooth.  Stir in flour and almond meal.
  3. Roll level tablespoons of mixture into balls, 5cm apart.  Flatten slightly with a fork.  Sprinkle with flaked almonds.
  4. Bake about 10 minutes or until brown.  Cool on wire rack.
Source: adopted from Australian Women's Weekly - Mix -Cakes, Muffins, Biscuits + Pudding


Monday, October 10, 2011

Cranberries Walnut Oatmeal Cookies


I have been searching for good oatmeal cookies with nut and fruit for a long long time.  Every time when I try a new oatmeal cookies recipe (except the anzac biscuits), none of my family like it!  I end up eating them all by myself.  When this happen, I just feel that I am the lousy garbage bin!  Finally, I find this at Ina Garten's cookbook from the library.  Like me, she has been looking for good oatmeal cookies recipe for a while.  In her recipe, she uses pecans and raisins and I substitute them with walnut and cranberries because I have none of them in my pantry.  This time, I don't need to eat them all by myself as my family all grab a few and the cookies are gone in a flash!  

Cranberries Walnut Oatmeal Cookies
(make 35)

Ingredients:
1 1/2 cups walnuts
1/2 pound (2 sticks) butter at room temperature
3/4 cup + 1 tablespoon brown sugar
3/4 cup + 1 tablespoon castor sugar
2 large eggs
2 teaspoon vanilla essence
1 1/2 cups plain flour
1 teaspoon baking powder
1 teaspoon ground cinnamon
1 teaspoon salt
3 cup rolled oats or old-fashioned oatmeal
1 1/2 cups dried cranberries

Method:
  1. Preheat oven to 180c/350F.  
  2. Place the walnuts onto a paper lined baking tray, bake for 5 minutes or until crisp.  Let cool then chop coarsely.
  3. Beat butter, brown sugar and castor sugar until light and fluffy.  Add eggs to the mixture one at a time, then add in vanilla essence.
  4. Sift flour, baking powder, cinnamon and salt in another bowl.  Slowly add the dry ingredients to the butter mixture.  Add oats, cranberries and walnuts until just combined.
  5. Place a heap tablespoon of dough onto the paper lined baking tray.  Flatten slightly with a fork.  Bake for 20 minuted or until lightly brown.  Cool on the rack.
Source: modified and adopted from "bared foot contessa - back to basic" from Ina Garten.


Tuesday, September 27, 2011

Lemon and Almond Slice


This recipe consists of three things that I want to have and it suits my greedy desire perfectly!  First, I want the base with coconut, then I want it to have lemon filling and lastly, I want it to have crunchy almond topping with a sweet glaze.  I actually combine three different recipes to create this and I'm really happy with the result.  Sometimes I feel that working in the kitchen is liked working in the lab.  While I have been trying many recipes with trial and error, occasionally I could make something that really surprise me!  And I wonder how people write cookbook, is that how they create new recipe?  This slice  tastes like cheesecake so it could be a "no cheese" cheesecake dessert.  I'm sending this to Anu's and Raven's September Event


Lemon and Almond Slice


Ingredients:
1 cup plain flour
1/2 cup icing sugar
1/2 cup desiccated coconut
145g butter, melted
1 can of 400g condensed milk
1 egg
1 tablespoon lemon rind
1/2 cup lemon juice
2 tablespoons plain flour, extra
1 teaspoon baking powder
1/2 almond flakes
2 heap tablespoons apricot jam

Method:

  1. Preheat oven to 180c.  Place the 18cmx28cm lamington pan with baking paper.
  2. Combine plain flour, desiccated coconut and icing sugar in a mixing bowl.  Add in melted butter and mix well.  Press mixture into pan.  Bake for 15 minutes.
  3. Mix condensed milk with egg in another bowl, beat well and then add in lemon juice and rind, extra flour and baking powder.  Pour over the base and sprinkle almond flakes over the top.  Bake for a further 30 minutes or until it starts to slightly brown.
  4. Heat the jam in microwave for 10 seconds or until it is thin to spread.  Brush it over the slice and let it cool in pan.  Cut into slices and keep in fridge when it is cooled. 


Tuesday, August 30, 2011

Coconut and Walnuts Slice


This coconut and walnuts slice is my family's new favourite besides the nutella brownie.  I like coconut slice as it is similar to the coconut tart we have in Hong Kong.  I have been making it using desiccated coconut and it always please my family.  That's changed when Maryanne comes to visit me and brings along her coconut slice made with shredded coconut with walnuts.  My son says that I have to get the recipe from her and my husband just keep saying how nice it tastes.  I find this recipe from the cooking magazine and modify it a little to make it quite close to Maryanne's.

I have knitted a baby jumper and two kids hats for the Guardian Angel Knitting Program.  They give me a pin as a thank you gift.  My hats aren't as good as it's shown in the knitting book, hopefully my knitting skill will improve and I'll knit better hats next year for the program.  I think I've done good to keep the needed kids warm and that's good enough.


Coconut and Walnuts Slice

100g butter, soften
3/4 cup caster sugar
3 eggs
3/4 cup plain flour
1/2 cup self-raising flour
1/3 cup milk
1/2 cup raspberry jam
1/2 cup chopped walnuts
1 cup desiccated coconut
3/4 cup shredded coconut


  1. Preheat oven to 180c.  Line a 20cmx30cm lamington pan with baking paper.
  2. Beat butter, 1/2 cup sugar until light and fluffy.  Add 1 egg, sifted flour and milk and mix until well combined.  Press mixture over base of the pan.  Spread jam over mixture.
  3. Whisk the remaining egg and sugar in a bowl.  Stir in desiccated coconut.  Spread the coconut mix over the jam.  Then sprinkle walnuts and shredded coconut over the top.
  4. Bake for 35-40 minutes or until light golden.
Source: adopted and modified from Super Food Ideas April 2011 Issue 124


Thursday, July 14, 2011

Nutella Chocolate Brownies


I would say brownies is easy to make but I have not come across a recipe that I really like.  The last time when I bake one, my lover boy told me please not add nuts into brownie again and I knew he wouldn't like dried fruit as well.  I alway believe that when baking chocolate cake or slices, using cocoa powder is not as good as using real chocolate.  And I want to proof that I'm wrong so I'm trying to make one using cocoa powder instead of melted chocolate but I must put in chocolate bits just in case it doesn't work.  When it is all ready to go into the oven, I couldn't stop myself putting some Nutella on top.  I know I have got the idea from somewhere.  Then I find that it is from kitchenbelleicious's Nutella Coconut & Caramel Brownies Although this brownie is made for my son, my husband loves it the most and I've made the boys happy.

Nutella Chocolate Brownies


Ingredients:
1 1/2 cup plain flour
1 cup caster sugar
1/2 cup cocoa powder
1 teaspoon baking powder
1 teaspoon salt
130g butter, melted
4 eggs, beaten
4-5 tablespoons Nutella
60g milk chocolate, chopped coarsely
60g white chocolate, chopped coarsely

Method:

  1. Preheat oven to 180c/160c fan-forced. Grease 19cm x 29cm slice pan; line base with baking paper.
  2. Melt butter in pan, leave cool a little.
  3. Sifted flour, cocoa powder, baking powder, sugar and salt into the mixture until well mixed.
  4. Add melted butter and beaten eggs into the dry ingredients. Stir in chopped chocolate. Spread mixture into pan. 
  5. Spread Nutella diagonally or vertically along the pan and then use a knife to swirl up and down the mixture to form a pattern.  
  6. Bake brownies 25-30 minutes. Cool in pan before cutting into slices.


Thursday, June 23, 2011

White Chocolate Macadamia Cookies


I originally made this cookies for the kids to take to school for the bake sale.  Then my daughter told me it had to be homemade and with no nuts.  I had no more white chocolate left so we ended up baking more cookies using milk choc chips and skipped the nuts.  When I went to university (that was the time before I learnt baking cookies) I needed to walk pass the coffee shop to get on the bus in the city.  My eyes were always looking at the creamy yellowish cookies called melting moment.  If I had a few dollars to spare, I would buy one to pamper myself.  It's funny though I don't have the urge to learn how to make it that time until I become a mum.  Even my daughter can make melting moment and we don't buy cookies that much these days since we have discovered few good recipes.  Homemade cookies taste the best!        


White Chocolate Macadamia Cookies


Ingredients:
1 1/2 cups plain flour
1/2 teaspoon bicarbonate of soda
1/4 cup caster sugar
1/3 firmly packed brown sugar
125g butter, melted
1/2 teaspoon vanilla extract
1 egg, beaten
180g white chocolate bits
3/4 cup roasted macadamias, chopped coarsely

Method:

  1. Preheat oven to 200c/180c fan forced.  Place baking paper onto baking tray.
  2. Sift flour, soda and sugar into a mixing bowl.  Stir in melted butter, extract and egg then chocolate and nuts.
  3. Drop rounded tablespoons of mixture, 5cm apart on tray.  Flatten it slightly with a fork.
  4. Bake cookies about 10 minutes.  Cook on wire rack.
Source: Adopted and modified from the cookbook "Mix -cakes, muffins, biscuits + puddings" by the Australian Women's Weekly.


Tuesday, May 31, 2011

Rice Bubbles - Mars Bar Crunchy Slice


A while ago I posted my first rice bubbles slice recipe, the fruit & nuts muesli bars as I was looking for recipes to use up the box of cereal.  After that, I went to try the other recipe I had bookmarked, the caramel nut crunch, with a great expectation that it would turn out crunchy and nutty.  However, it turned out as a disaster as it was soggy and it was a waste of those lovely nuts I put in.  The recipe called for soft caramels and I used the tin "fill top caramel" and that probably not the right kind of caramels.  Should I use those soft caramel candy instead?  I was a bit hesitated to try this Mars Bar recipe as I didn't like Mars Bar too much. (too sweet)  I used dark chocolate instead of milk chocolate to balance the sweetness of the Mars Bar and it turned out a success.  It was crunchy and chocolatey.  I have used up all the rice bubbles, I may have to buy another box just to make this slice and have another attempt for the caramel nut crunch.  I might end up forever looking for recipes for rice bubble.

Mars Bar Crunchy Slice

Ingredients:
195g Mars Bar (about a packet of fun size one, leave 2 for yourself)
90 butter
3 cups Rice Bubbles

Topping:
200g dark chocolate
30g butter

Method:
  1. Place baking paper onto a 19cmx29cm lamington pan.
  2. Combine Mars Bars and butter in a large saucepan.  Stir constantly over low heat without boiling until mixture is smooth.  Then stir in rice bubbles.  Press the mixture evenly into the pan.
  3. Melt the chocolate with butter in the microwave with a microwave safe container.  Heat on medium heat for 40 second, then stir a bit and repeat the process until the chocolate and butter are well mixed.  Spread onto the slice and refrigerate until set before cutting.  
Source: Adopted and modified from the cookbook "Cakes & Slices" from the Australian Women's Weekly, Home Library.


Tuesday, May 17, 2011

Double Choc Caramel Slice

I took the kids to the corner shop to get some lollies for a treat on the weekend.  We found this little piece of caramel slice selling at the counter for only 50c.  I hadn't made caramel slice for a long time because I could get quite addicted to it.  I had all the ingredients at home so I went home and started cooking straight away.  My son took two slices to school the next day and his friends were willing to pay $2 for a slice.  He shared a little bit with his good friend and ate the rest all by himself while the rest of his friends are dribbling at it.  

Double Choc Caramel Slice


Ingredients:
3/4 cup self-raising flour
1/4 cup plain flour
2/3 cup caster sugar
1/2 cup desiccated coconut
125g butter, melted

For the filling:
395g sweetened condensed milk
2 tablespoons golden syrup
30g butter

For the topping:
100g dark cooking chocolate
100g milk cooking chocolate

Method:

  1. Preheat oven to 180c.  Line a 18cm x 28cm lamington pan with baking paper.
  2. Combine the first 5 ingredients, mix well.  Press into pan and bake for 10 minutes.
  3. Combine condensed milk, golden syrup and butter in pan.  Stir over medium heat until boiling, reduce heat and stir constantly until it changes colour.  (Do not worry if there are some burn bits, that doesn't show once baked.) Spread the caramel over base, bake further 10 minutes.  Let cool.
  4. Melt the dark and milk chocolate in a microwave safed bowl with medium heat for 30 seconds, and further 20 seconds until the chocolate melted.  Spread it over the caramel and put the slab of slice into the fridge before cutting into small pieces.

Saturday, April 23, 2011

ANZAC Biscuits

This year's ANZAC Day falls in with Easter Monday so we are having 5 days off from Easter Friday to Tuesday.  Many people have taken the opportunity to go for holidays and the weather is beautiful from where I live.  The beachside is crowded with visitors and they are enjoying our sunny and clean beaches.  ANZAC (Australia and New Zealand Army Crops) Day is a national holiday, I usually sleep in and let the fighter jet wakes me up when it flies over my roof or I will take the kids to the ANZAC March, march with the school team early in the morning.  School kids would wear their grandparents badges, proudly waving the Aussie flags and march along the street with the war veterans and people from the local communities.  We'll ended the ceremony at the memorial park after the speeches from army officers, retired soldiers, councillor and students to show our respect for those who serve our country.  Lest not forget.  Then we'll enjoy the rest of day with some ANZAC biscuits.  During WWI,  housewives and mothers made these biscuits and sent to the soldiers in the trenches to show their support and love.  It is my favourite biscuit.    


ANZAC Biscuits

Ingredients:
125g butter
1 tablespoon golden syrup
1 teaspoon bicarbonate soda
2 tablespoons boiling water
1 cup rolled oats
1 cup plain flour
1 cup desiccated coconut
2/3 cup sugar
1/4 cup almond kenels, chopped (optional)
1/4 cup sultanas (optional)

Method:

  1. Melt butter and golden syrup is a saucepan over low heat.  Add the bicarbonate soda mixed with boiling water into the butter sauce.
  2. Combine the dry ingredients in a mixing bowl.  Pour the melted mixture into the centre and mix to a moist but firm consistency.  Divide the mixture into two lots.  One lot mix with almonds and the other lot mix with sultanas.
  3. Drop teaspoon full of mixture onto a paper lined baking tray.  Bake in slow oven for 20 minutes or until golden brown.  Cool a few minute on baking tray before removing to a wire cooling tray. 

Monday, March 21, 2011

Rice Bubbles - Fruit & Nuts Muesli Bars


I have a box of Rice Bubbles cereal rejected by my kids as they are going back to the good old Weetbix for breakfast.  The kids like the store bought snack bars and I find two recipes making them using Rice Bubbles.  One is this muesli bars and the other is a nut crunch bars.  The good thing making your own snack bars is that you can control the sweetness and putting in your favourite ingredients.  Stay in tune for the nut crunch bars.

I find it a bit oily and still too sweet so I have reduced the amount of butter and sugar.
  
Fruit & Nuts Muesli Bars


Ingredients:
1 cup toasted muesli
3 cups Rice Bubbles
1/2 cups coconut
125g 100g butter
 1/4 cup 2 heap tablespoons honey
1/3 cup smooth peanut butter
1/4 cup  2 heap tablespoons raw sugar
2 teaspoons of toasted sesame seeds (I use a mix of black & white)
extra almond kernels

Method:

  1. Line a 19cmx29cm lamington tin with baking paper.
  2. Combine muesli, Rice Bubbles, coconut, extra almonds in bowl.
  3. Combine butter, peanut butter, honey and sugar in a saucepan, stir constantly over heat without boiling until butter is melted and sugar is dissolved.  Bring to boil, reduce heat, simmer uncovered for 1-2 minute, stir occasionally to prevent burn.  
  4. Stir the peanut butter caramel into the dry ingredients.  Press into prepared pan, sprinkle sesame seeds over the surface.  Leave it cool and cover it with gladwrap.  Press again until it is firm enough and refrigerate it before cutting.  

Note: The toasted muesli I use is combined with oats, dried fruit, almonds, sunflower seeds, pumpkin seeds and sesame seeds.

This recipe is adopted and modified from the cookbook of "Cake & Slices" published by the Australian Women's Weekly. 

Monday, February 21, 2011

Rainbow Choc Chip Cookies

It is always a headache to decide what to pack for the kids to school.  You never want them to bring back any untouched food as it will always go to the bin if it is spoiled.  It's such a waste of food and time to try to prepare something wholesome for them if it gets throw away.  Being a mother, you worry if your kids is eating well to have energy to last for the day.  It is important to feed them food that they will eat and have good nutrition for growth.  I would not like my kids throw their sandwiches to the bin and ask for takeaway food after school.  Their lunch boxes always have something in carbohydrate such as sandwiches, fresh fruit then there will be something as a treat such as nuts, crackers or cookies and they also have filtered water.  I try not to overpack for them so they can finish their lunch and go for a play.  I always have to pack a few extra of this choc chips cookies for them to share with their friends as everyone just loves it.  This recipe is not suitable for people with nuts allergy as it contains peanut butter.

Rainbow Choc Chips Cookies


Ingredients:
125g butter
1/2 teaspoon vanilla essence
1/3 cup caster sugar
1/3 cup brown sugar
1/3 cup smooth peanut butter
1 1/4 cups self-raising flour
1/4 cup coarsely chopped dark cooking chocolate
rainbow choc chips

Method:

  1. Pre-heat oven to 180c. 
  2. Cream together butter, vanilla, sugars and peanut butter until light and fluffy.
  3. Add sifted flour and dark chocolate chucks to the ingredients to form a firm dough.  Roll a teaspoonful of dough into ball and place onto the grease lined baking tray.  Slightly press down the ball with the prongs of the fork and sprinkle some rainbow choc chip on top.  Leave a 2 cm gap in between each cookies.  
  4. Bake 12-15 minutes in the oven and allow to cool on tray few minutes before removing to the wire rack.  Store in an air tight container when it is completely cool.
Note:  You can replace the self-raising flour with plain flour by adding 1/3 teaspoon of baking powder.