Showing posts with label dessert. Show all posts

Saturday, June 27, 2015

Rose Apple and Apple Crumble Tartlets


I would say apple is one of the best winter dessert. They are never too sweet and is always so satisfying. Cooked apple is also easier to digest and contains good fibre.

This rose apple is quick and easy to make and looks as pretty as a real rose. It's an ideal food for the last minute entertainment.

For the apple crumble, I got the idea making it after seeing it selling at the local bakery. When my son had it, he asked if they were the frozen apple tarts from the supermarket. Oh, yes and no, I use the ready made frozen tart cases and make the filling using fresh apples. They are also a good snack to have anytime of the day.

Thanks for the new "like" at my Facebook page! Have a good weekend!

Rose Apple
(make about 11)

3 Fuji apples
2 sheets of puff pastry
2-3 tablespoons apricot jam
1 -2 tablespoons water
2 tablespoons lemon juice
ground cinnamon


Method:

  1. Cut the apple into halves. Use a knife to remove the core. Then slice vertically into thin slices.
  2. Place the apple into a microwavable bowl, add the lemon juice and water nearly cover the top. Microwave for about 3 minutes then another 2-3 minutes or until the apple is soft enough to roll up but not over cooked. Then drain the apple.
  3. Mix the jam with water and microwave for 30 seconds.
  4. Cut each sheet of pastry into 5-6 portions. 5 would be easier the roll up. Spread with some jam then lay the apple slice slightly above the top edge (about 1cm) with the skin side facing up. 
  5. Overlapping each piece, sprinkle with cinnamon then fold the bottom pastry upward and roll up the rose starting from the left to the right. Place them into a greased 12 holes muffin tray. Repeat the process until you finish all the pastry.
  6. Bake in a pre-heated oven at 190c for 25 minutes or until the pastry turns golden.


Apple Crumble Tarlets
(make 4)

4 ready made frozen tartlet cases
1 green apple
1 teaspoon sugar

for the crumble:
2 tablespoons plain flour
2 tablespoons brown sugar
2 tablespoons butter

Method:

  1. Peel, cored and cut apple into small chuck.  Cook in a small saucepan with 1/2 cup water.  Cook until the water evaporated, add sugar and stir well.
  2. Put the flour and sugar into another bowl. Rub into butter until resemble crumb.
  3. Spoon the apple into cases, then sprinkle with the crumb.
  4. Cook in a pre-heated oven at 180c for about 15-20 minutes until the topping turns golden.

Thursday, June 18, 2015

Key Lime Pie


I always want to make this pie after seeing many bloggers making it. We couldn't get any key lime in Australia so I am using the green lime we have. When I made this pie, my son just declared that he would not eat it because lime is not his usual diet. My teenage boy always give me harsh comment these days. However, after taking a piece, he came back for a bigger piece and this had become one of his favourite dessert.

It really is a very easy dessert and now I understand why it's so popular!

Key Lime Pie

Ingredients:
150g McVite's digestive biscuits
25g butter, melted
4 egg yolks
395g can condensed milk
1/2 cup lime juice (about 3 limes)
1 tablespoon  lime zest

Method:

  1. Process biscuits until crumble in a food processor. Add melted butter and mix through. Press into a pie dish.
  2. Preheat oven at 160c and bake the base for 10 minutes. Cool.
  3. Add the egg yolks and lime zest into a bowl, whisk till egg is light and creamy. Stir in condensed milk and lime juice, whisk until well combined.
  4. Pour the filling over the pie base. Bake for 12 minutes at 160c or until the filling is just set. Fridge for 3 hours before serving.
Source: adopted and modified from http://www.taste.com.au/recipes/27475/key+lime+pie


Tuesday, February 17, 2015

Agar Agar Jelly Cake with Coconut and Pandan


Chinese New Year is coming up on 19 February. This year my in-laws from Malaysia is coming to spend CNY with us making it extra special. As usual for any Chinese celebration, there will be lots of cooking and eating. Agar Agar jelly is a popular sweet you would see in any Malaysian party. It is made from sea vegetable which is a good substitute for gelatine for vegetarian.  It also helps to create many colourful and healthy dessert. It is a great last minute dessert that is very simple to prepare.

I finally find the frozen pandan leaves from Yuen's Market at Sunnybank in Brisbane. I usually use the pandan essence which is very bright green in colour and taste not as good as the real one. I normally make this dessert using coconut milk, evaporated milk and mung bean.  As I don't want to over power the taste of the pandan, I have omitted the evaporate milk here. After discovering this Asian vanilla essence, surely there will be more pandan recipes to come. If mung bean is not your thing, you can omit it as well.

Have a great Chinese New Year!

Agar Agar Jelly Cake with Coconut and Panda

Ingredients:

A:
1/4 cup split mung beans or yellow split peas
1 cup water

B:
3 pandan leaves
1 cup boiled water at room temperature

C:
20g agar agar leaves
2 litres water
1 3/4 cup sugar or more to taste
1 1/2 cup coconut cream

Method:

  1. A: Cook mung beans with water till boil, turn down heat and simmer for 10 minutes or until the beans are cooked. Strain and put the bean aside.
  2. B: Cut the pandan leaves into pieces. Add into the blender with water and blend till the juice is green. Strain and preserve the water and discard the leaves.
  3. Place agar agar into boiling water and let it dissolves. Add sugar and stir till sugar dissolves.
  4. Pour about 1/3 of the agar agar sugar mixture into a large baking tray (25cmx30cm). Keep in fridge for about 15 minutes.
  5. Add coconut cream and pandan juice to the remaining agar agar sugar mixture. ( If not using pandan juice, you can add 1/4 cup evaporated milk here) Spread mung bean over the 1st layer of the cake. Then use a ladle to pour the coconut mixture into the tray.  Keep in fridge for at least 1 hour before cutting into slices. It is best to consume the jelly slices within one or two days.


Tuesday, February 10, 2015

Nutella Strawberry Shortcake


This is another great idea to celebrate Valentine's Day. As my family doesn't like cake decorated with whipped cream a lot. I choose to ice the cake with nutella and serve it with ice-cream. It could be one of the last minute dessert that looks like a lot of work has been done!

Nutella Strawberry Shortcake

Ingredients:
60g butter
2 tablespoons caster sugar
2 egg yolks
3/4 cup Lighthouse low-protein self-raising flour
1/3 cup milk
1 punnet strawberry
nutella
icing sugar for dusting

Method:

  1. Cream butter and sugar until light and fluffy, add egg yolks and beat well.  Add in sifted raising flour and milk until well mixed.
  2. Press dough into a lightly greased 20cm sandwich tin, bake in 180c for 15-20 minutes.
  3. Remove cake from tin and cool slightly. Spread with nutella and decorate with strawberries. Serve with cream or ice-cream.

Thursday, October 2, 2014

Magic Cake


My dear friend, after finishing my lists of health check, it's great to get good news from my doctors. As I am under health surveillance, I am good for another couples of months till the next test. So, let do some celebration!

I find this recipe from Zoe of Bake for happy kids. Originally this cake is introduced by my cousin-in-law who also introduce me to the Flourless chocolate cake with red kidney beans.  I have been following Zoe for a long time and have found several good recipes from her. This cake is called magic cake as you don't need to do much and the cake would produce three layers: a base layer that tastes like Chinese steam cake, a middle with custard filling and the top with a soft velvety sponge. This cake is best to serve within 1 or 2 days as the top sponge would lose its freshness and the bottom base becomes hard by keeping in the fridge. I would recommend to serve on the day at room temperature.


Please check out Zoe's recipe here. The only alternation I did in the recipe was to bake in a rectangle lamington pan. Then I uses a scone cutter to cut the cake out from the pan. Dust it with some icing sugar and decorate with white chocolate butterflies that dusted with fairy dusts and strawberries. 

Enjoy the magic!


Saturday, September 6, 2014

Happy Father's Day - Espresso Brownie Cupcakes


This is the second time I make these cupcakes, my family likes the strong flavour of these cakes. My husband reckons anyone like coffee would like them. It's very muddy and bitterly kind if chocolate taste so I would recommend to serve it with some fresh cream or/and ice-cream with strawberries.

This Sunday is Father's Day in Australia, why not show your appreciation to bake your dad a sweet treat instead of buying him a box of chocolate? It's also the Chinese Mid-Autumn Festival (Moon Festival) on Monday, this is a great weekend to have a family gathering.

Happy Father's Day!


Espresso Brownie Cupcakes
(make 12)

180g dark cooking chocolate, melted
2 tablespoons instant coffee powder
1 tablespoon hot water
1/4 cup milk
3 eggs
1/2 cup olive oil
1 teaspoon vanilla essence
1 cup plain flour
1/2 teaspoon baking powder
1/4 cup cocoa powder
1/2 cup + 2 tablespoons caster sugar

Chocolate ganache:
100g dark cooking chocolate
1/2 cup thicken cream
1 teaspoon Kahlua (optional)

Decoration:
white chocolate, melted
thickened cream, whipped + sweetened with a little icing sugar
strawberries
ice-cream

Method:

  1. Melt chocolate with a double boiler with hot water. Leave cool a little.
  2. Mix the coffee powder with hot water then mix all the wet ingredients into a mixing bowl and shift the dry ingredients into another mixing bowl. Pour the wet ingredients into the dry ingredients and fold till the mixture is incorporated.
  3. Spoon the batter into a paper lined 12 holds muffin pan and bake for 20 minutes in a pre-heated oven at 160c.
  4. Meanwhile, prepare the ganache, melt chocolate in a double boiler with hot water then stir in the cream and liquor. Put the ganache into the fridge until it is spreadable. Spread over to the cool cupcakes.
  5. Decoration: grease a foil with a little old, put the melted white chocolate into a zip bag. Cut a little corner and pipe the chocolate into the foil with a desirable pattern.  Cool into fridge before peeling it out.
  6. Take the paper out from the cupcake. Put a halved strawberry over the cake with a white chocolate swirl, serve with more strawberries, whipped cream and ice-cream.


Monday, April 7, 2014

Easter treats with Choc-Peanut Tartlets and Salted Caramel Tart


How can you celebrate Easter without chocolate? Here are two very simple and easy tartlets and tart that may make the preparation of Easter much easier for you.  

This year my daughter will be having Easter in France and I'm going to miss her very much. My son may feel happy that he can get all the Easter eggs but she reckons she would get better chocolate eggs in France. My little girl is growing up as a young lady, learning to drive, to be independent, to achieve her best in life.  I'm missing the fun time when the kids believed in Easter Bunny and got so excited on Easter Sunday for the Easter eggs hunt!  However, the big kids still love Easter eggs and chocolate treats for Easter!

Have a happy Easter and enjoy a great time with your family! 


Choc-Peanut Tartlets

Ingredients:
frozen tartlet cases
peanut butter
dark cooking chocolate and white chocolate
100 & 1000 sprinkles and Easter eggs

Methods:
Bake the tartlet cases followed by the instruction of the package.  Spoon in peanut butter into the cases and then toped with melted chocolate, decorated with sprinkles or Easter eggs.

Salted Caramel Tart

Ingredients:
1 frozen tart case
1/4 cup caster sugar
25ml water + extra 2 tablespoons water
25g butter
1/2 can of 397ml condensed milk
1/4 teaspoon salt
almond flakes for decoration
melted chocolate for decoration

Method:

  1. Bake the tart case followed by the instruction of the package.
  2. Meanwhile, place sugar and 25ml water into a small saucepan, boil till sugar dissolved.
  3. Bring to boil till dark golden colour, remove from heat and add the extra 2 tablespoons. The mixture is very hot, watch out for spit!
  4. Then add butter to the caramel followed by condensed milk and salt. Return to heat till boil. Let cool before fill into the case.
  5. Decoration the cake with melted chocolate and almond.

Saturday, July 27, 2013

Chocolate & Salted Caramel Heart-shaped Tart and a Speedy Recovery


My dear friend, I will be starting my 6 months of chemo treatment in 2 days time.  After the surgery, the doctor told me that I had cancer and instantly my body kept shaking even my mind was very clear, thinking how should I deal with this trauma again.  Having had two cancers within three years were not easy to handle. The doctor had been telling us good news all the way until the pathology report had been given.  Those two weeks before and after the surgery were so stressful, worrying that I could be sick again.  I did not know how to tell my husband as I knew he would be very disappointed as he said to me, "Aren't you suffering enough?" I was liked a child telling the doctor that I'd been good all these years and wonder if I could live till 50 years old seeing my kids become adult.  It was a comfort that he said he'd seen a lot of patient like me and they were all well.  I'm grateful that out of this bad luck, my survival chance is still very high. Just because I care of my health and I find this cancer early to save myself.  So here I'm, ready for another battle and learn to be a healthier and happier person.

During the recovery time, many people came to visit me, giving me flowers and leaving comments at this blog.  I could see the love and care from those kind-hearted people. (especially to you, Delynne if you're reading, my friend) I became a more relaxed person and what I really enjoy was to have a good family time watching TV together, waiting my husband came home from work and sat besides him for dinner.  I don't dream about holidays or luxury things as I treasure every moment I'd with my family and live the way as simple as I can.  I hope this type of stress free lifestyle could make me cancer free. I went to see a doctor last week and my blood test show that my health is at it best for years, so thanks for the good diet and stress-free mind!

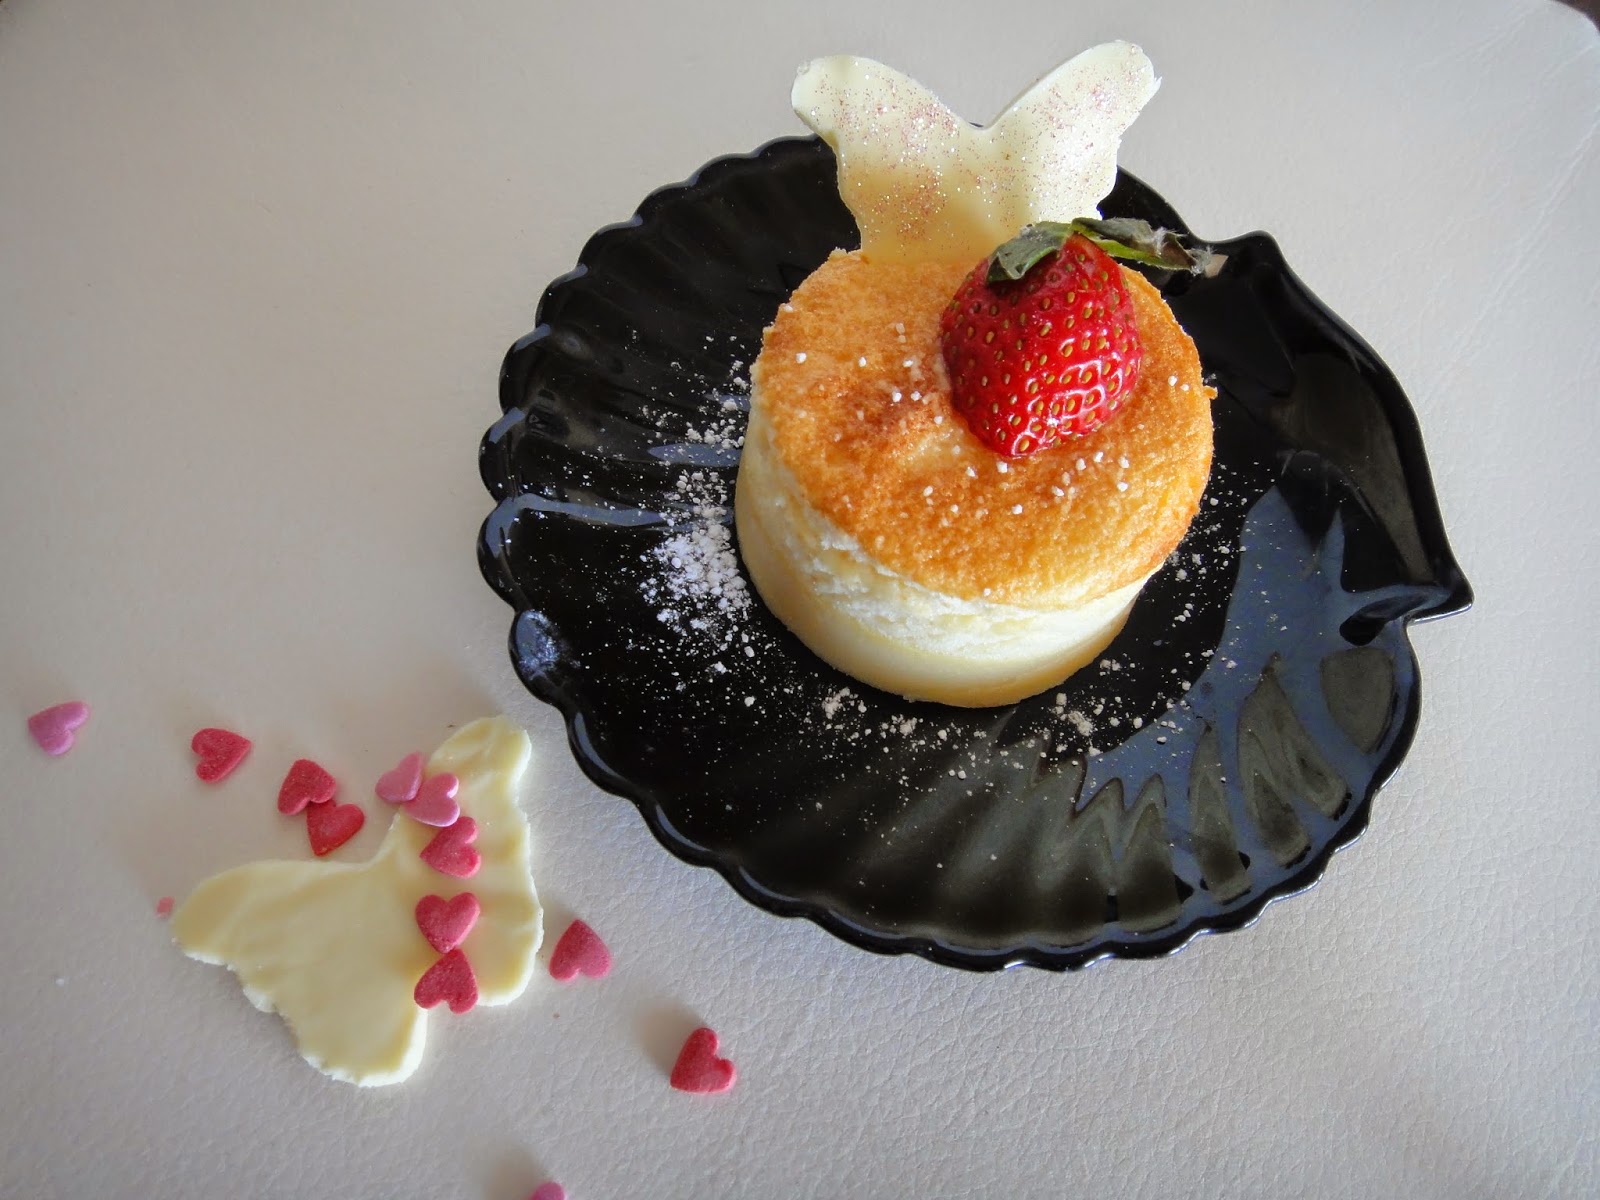
I made this chocolate tart before I had the surgery.  I decided to have sweet food only for birthdays to maintain a healthier lifestyle. I leave the baking to my children if they want to have some cakes or cookies.  Now I meditate, read books, pray and exercise.

It's a six years of promise for me to make something chocolate out of the BBC magazine for my husband.  He probably has forget about it but I haven't!  When I tidy up my pile of food magazines, this little chocolate recipes book catches my attention and I decide it's time to make my promise!

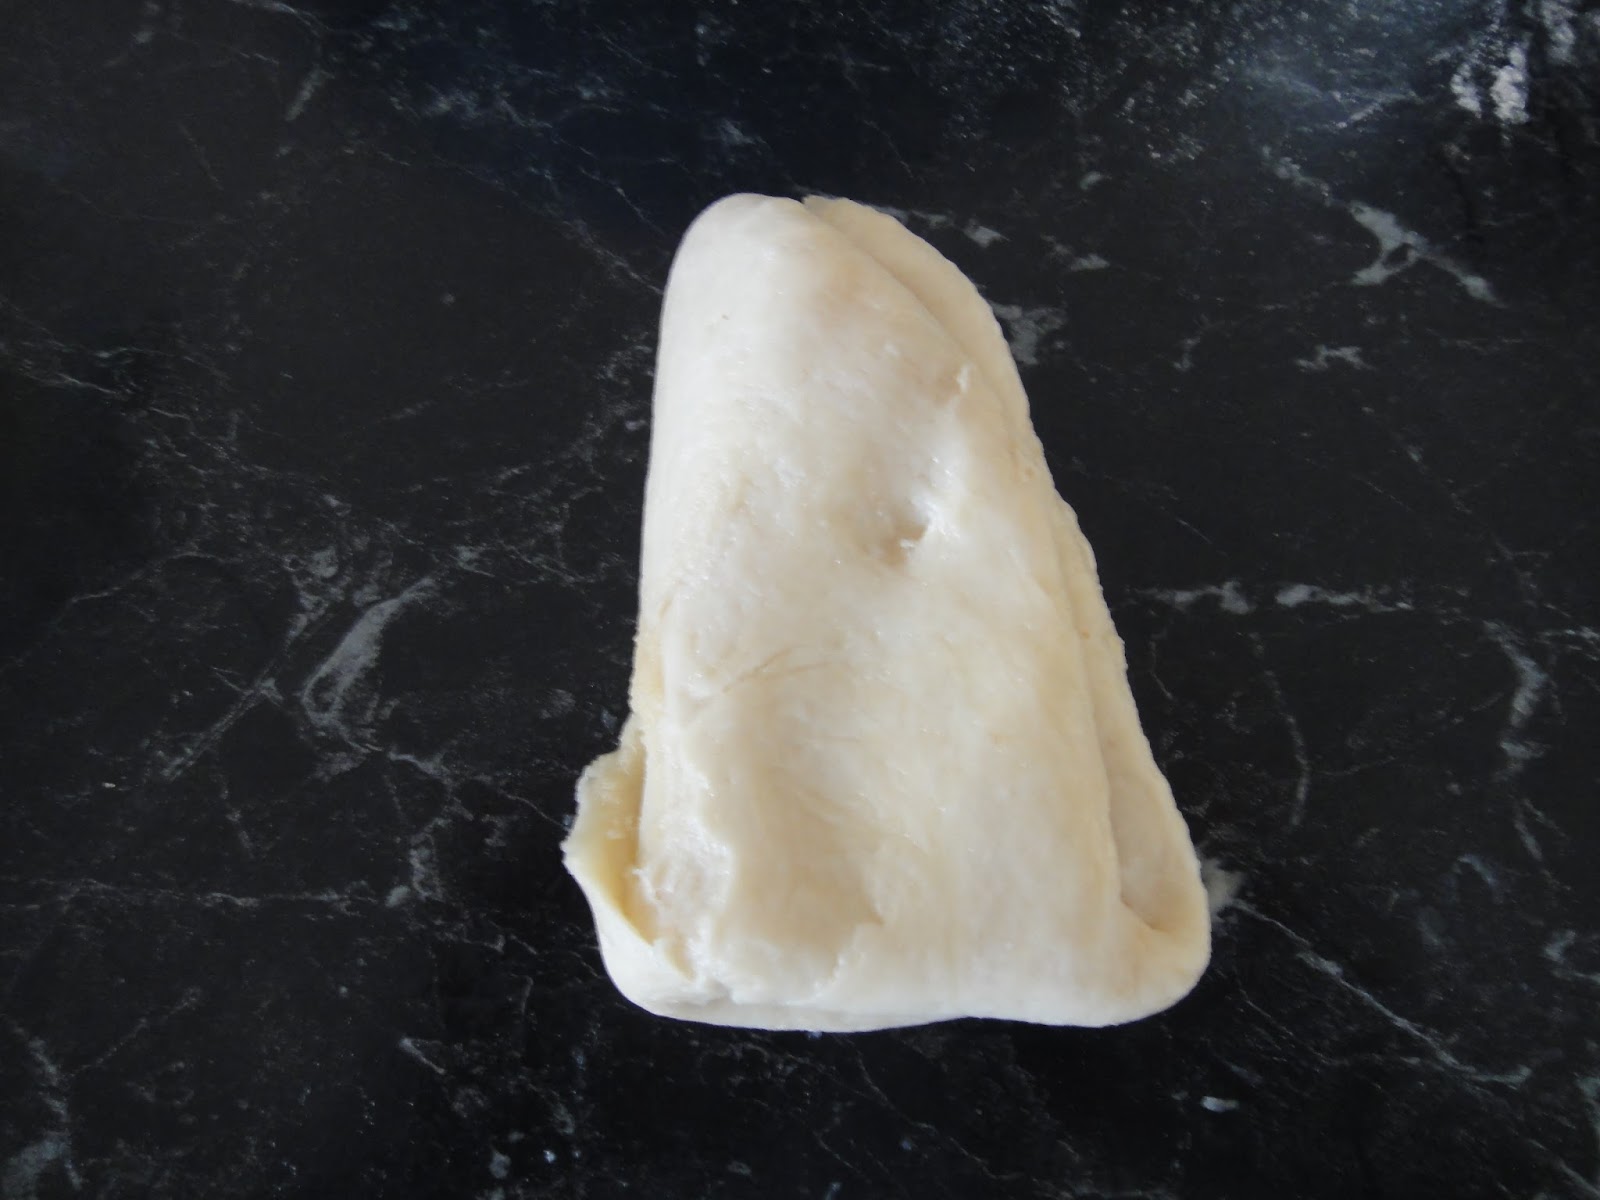
I haven't made pastry for a while and winter is the best time to make it as the cold weather helps to keep the pastry in shape.  It needs a bit of patience to make the salted caramel as it takes a full attention to keep stirring and waiting for it to thicken. I use less salt for the caramel as I have been using salted butter for the pastry and the chocolate filling. The pastry is crispy and the chocolate custard filling is not too sweet, not over powering the sweetness from the caramel.  It gets too sweet if you add loads of ice-cream as my family do, I prefer to have it with just a little bit of ice-cream or some fresh cream.

I guess it's not too late to make my promise after six years of waiting! And thanks again for those supportive comments and the new likes at my facebook page!

Chocolate & Salted Caramel Tart
(make 6 small or 1x 20cm tart)

Ingredients:

For the pastry:
1 1/3 cups plain flour
2 tablespoons caster sugar
2 tablespoons cocoa
100g unsalted butter, cubed (I use salted)
3 egg yolks
2 drops of vanilla extract

For the salt caramel base:
1 cup caster sugar
125g salted butter
1/3 cup thicken cream
1/2 teaspoon sea salt flakes (I use 1/3)

For the chocolate filling:
2 tablespoons caster sugar
1 egg plus 1 egg yolk
100g milk chocolate button
75g unsalted butter (I use salted)


Methods:

  1. Place the flour, sugar and cocoa in a food processor and process until combined.
  2. Add butter, eggs and vanilla into the dry ingredients and process in a pulse motion until the mixture form a dough.  Shape the dough into a ball and flatten into a disc shape.  Wrap with cling wrap and chill for 30 minutes in the fridge.
  3. Meanwhile, make the salted caramel.  Boil sugar and water in a pan on low heat until sugar dissolves.  Stir in butter, turn on heat to medium and simmer for 20 minutes, (it takes me longer than that, about double of the time) stirring occasionally until it turns to caramel colour.
  4. Remove from the heat and stir in half of the cream.  When the mixture stops bubbling, stir in remaining cream and sea salt. Let it cool.
  5. Take the dough out from the fridge.  Divide into 6 equal portions.  Roll out pastry and press onto the tart tins. Chill for another 15 minutes.
  6. Meanwhile, make the chocolate filling. beat the sugar, egg and egg yolk in a mixing bowl until thick and pale. Melt the chocolate and butter in microwave at medium heat for 30 seconds, then another 20 seconds until they are melted, stir to smooth out the mixture.
  7. Preheat the oven at 200c (180c fan-forced), line pastry with baking paper filled with ceramic beans.  Baked blind for 12 minutes.
  8. Spread 1 tablespoon of caramel sauce over each pastry base, spoon about 3-4 tablespoons of chocolate mixture evenly on top. (I only use half of the caramel and use the other half for ice-cream topping) Bake for another 12 minutes or until the chocolate topping is set, firm to touch. (It takes me longer than 12 minutes) Let cool, remove from the tins and serve with ice-cream and extra caramel sauce.    

Adopted and modified from BBC Australian Good Food Chocolate Classics, August 2009.

Friday, January 4, 2013

Chinese Style Mango Pudding (eggless)


Living in Australia, we always have mangoes for every Christmas.  My husband would buy a whole tray of mangoes and the Bowen (Kensington) mango is my favourite as it is sweet with no fibre in the flesh.  When I was about 9 or 10 years old while living in Hong Kong, I tried to open the seed of the mango thinking there would be something fantastic inside since the flesh of mango tasted so nice.  Of course, I found nothing interesting there but every summer we would enjoy at least a whole tray of mangoes.

When I went to Yum Cha in Sydney, the waitress was pushing the food trolly with mango pudding and mango crepes around the tables.  Mango is a really nice fruit to make into dessert.  I like this pudding recipe from Christine's Recipes as it is eggless and light.  After all the big feast we had from Christmas, this is a simple and nice dessert to have for the hot summer!  With the summer holiday having kids at home, why not get them to help making this yummy dessert? 

Chinese Style Mango Pudding (eggless)
(make 4)

1 packet of 85g mango flavour jelly crystal
90ml milk
40ml evaporated milk
110ml hot water
55ml cold water (boiled)
2 large mangoes

Method:

  1. Dissolve the jelly crystal with the hot water, then add the cold water.  Stir in the milk and the evaporated milk.
  2. Pour the jelly mixture into four glasses.  
  3. Cut one of the mangoes into cubes and add into the jelly mixture.  Keep into the fridge for 2-3 hours or until the pudding is set.
  4. Cut the remaining mango into cubes and add to the pudding before serving.
As this dessert is not very sweet, it is best to consume as it is.  I have tried to serve it with ice-cream, the sweetness of ice-cream covers the taste of mango which is not a recommended combination.


Saturday, September 15, 2012

Red Bean Moon Cake with Flaky Pastry (紅豆螺絲酥皮月餅)


Last week I went to school to help out the hospitality students to understand cultural diversity.  Six of the parents participate all came from different background including Thai, Indian, German, South African, Italian and Chinese.  One of the thing we were taking about was the festival celebration, and I mentioned that lots of Chinese dessert for celebration was round as the roundness mean smooth and harmony.  The Chinese Moon Festival is coming up on 30 September and I got the idea making this flaky pastry mooncake from my mother-in-law when she posted her taro mooncake on FB.

I always have difficulty in making the swirl looking flaky pastry and I got the step-by-step instruction from Cherri, ch3rri blossoms.  I use canola oil instead of shortening as it is a healthier oil and I baked it instead of deep fry.  The other popular flavour for the mooncake include taro, green tea and lotus.  Moon cake usually has an salted duck egg yolk inside the filling, I have opted that out as I prefer it eggless.

The Moon Festival is the second biggest festival besides the Chinese New Year.  People give mooncake as a gift and everyone gather together for a family dinner on a full moon night.  A true happiness for me is to enjoy the time with my family, just as simple as that.


Red Bean Moon Cake with Flaky Pastry
(make 16)

Ingredients:

Filling:
red bean paste (store brought)

Water dough:
200g plain flour
1/2 teaspoon white vinegar
50g canola oil
30g sugar
100g water

Oil dough:
180ml plain flour
100g canola oil

Method:

  1. Roll the red bean paste into 16 golf ball sized balls.
  2. For the water dough; mix all together to form a dough, rest 20 minutes.  Then divide into 4 equal portions.
  3. For the oil dough; mix all together to form a soft dough, divide into 4 equal portions.
  4. Flatten the water dough and place the oil dough into the middle and wrap around it.  Do not flour the bench as the dough is oily enough and will not stick to the table.
  5. Roll out the dough into a long shape, fold half from the short side, then fold over to the right.  Roll out one more time.
  6. Then roll into a swiss roll from the long side, cut into 4 pieces.
  7. Roll each piece flat into a round shape, about the size of the dumping pastry.  Place a piece of red bean paste into the middle, wrap around to form a ball and seal the bottom.  Repeat for the rest of the dough.
  8. Preheat oven at 170c. Place the mooncake sealed size down onto the paper lined baking tray(s), bake 25 mins or until brown.
Source: http://ch3rri-blossoms.blogspot.com.au/2009/12/flaky-taro-pastry.html

water dough and oil dough
Flatten water dough and oil dough on top
Oil dough wrapped inide of the water dough
1st time roll out 
roll half from long side
roll half to the right
2nd time roll out
cut into 4 pieces
Roll flat and fill with filling
ready to bake! 


Tuesday, August 21, 2012

Easy Banoffee Pie


Last time when I went to a morning tea gathering at school, one of the mum brought along a Banoffee pie.  They were saying that this was an American type of pie so I took a piece of it and it tasted pretty good.  It is basically a caramel tart topped with whipped cream and banana.  With the search of the internet, it is found that the birthplace of this pie actually come from The Hungry Monk restaurant from the UK.  The word banoffee means any food product that has the taste of banana and toffee.  It was created in the 1972 and it became popular in the America, Australia and India as well.  For more information please click here.  In Australia, caramel tart is very popular and it sometimes served with whipped cream.  When I went to boarding school, it would be everyone's heavenly day to have caramel tart for dessert.  To simplify the recipe, I use Top'n Fill caramel instead of the condensed milk.  If you wish, you can follow the traditional method to boil the tin for 1 1/2 hours to make the caramel.  Can you believe that such a yummy dessert only take 4 ingredients?

Banoffee Pie

1 tin of Nestle Top'n Fill Caramel
1 frozen pie crust
whipped cream
banana, sliced

Method:

  1. Bake the pie crust follow the direction of the package.  Just when the crust starting to turn brown, spread the caramel into the pie shell and baked for a further 5-8 minutes.  
  2. Cool pie to room temperature, spread with whipped cream and top with some sliced banana.  Chill before serving.


Saturday, July 21, 2012

Mini Cheesecake Topped with Homemade Pineapple & Passionfruit Jam


I have been blogging for nearly 2 years but I have never had a post for cheesecake.  In an actual fact, I love cheesecake but nobody like it in my household.  Every time when I walk pass the cakes shop and my eyes will be loading onto the cheesecake.  I have this block of cream cheese in the fridge for so long (not expired yet) and it has been calling me to make into cheesecake every time when the fridge door is opened.  I decide to make into several small one so that I can give them away and I could still have some for myself, therefore I won't be too guilty eating the whole lot.

This post come with the pineapple and passionfruit jam recipe I mentioned from the previous post.  For the bread machine method to make strawberry jam to make the jam drop cookies, please click here.  If you ever wonder what's the different between preserves, jams and jellies, preserves resemble jams but have larger chunks of fruit while jams are mashed fruit cooked with sugar until thick.  Jellies are very firm, translucent spread made of fruit juice boiled with sugar.


Mini Cheesecake Topped with Homemade Jam
(make 8)

1 packet of Nice biscuits (or digestive biscuits)
100g margarine, melted
1/2 teaspoon ground cinnamon

For the filling:
250g low-fat cream cheese
1/2 cup caster sugar
1 1/2 tablespoon lemon juice
1/2 teaspoon vanilla essence
2 eggs, beaten

For the topping:
Pineapple & Passionfruit Jam or Jam of your choice
300ml Thickened Cream, whipped with a tablespoon of icing sugar

Method:

  1. Process biscuits into fine crumbs through the processor.  Place crumbs into a bowl, add in melted margarine and cinnamon.  Mix well. 
  2. Spoon and press the crumbs into 8 x 12cm tart cases. Fill the side with crumbs as well.  There could be some leftover crumbs. Keep the base chill in the fridge while making the filling.
  3. Beat cream cheese and sugar until soft and creamy,  then add in eggs, lemon juice and essence.  Stir though till smooth.
  4. Bake in a pre-heated oven at 150c for 20 minutes or until the filling is cooked.  Leave the door ajar and cool the cheesecake in the oven for 10 minutes.  
  5. Leave the cake cooled at room temperature.  Then spread a layer of whipped cream over the top and pipe some cream around the edge.  Spoon in some jam in the middle of the cake.  Keep the cheesecake into the fridge. 

Pineapple and Passionfruit Jam (Bread Machine Method)
( make about 700g)

460g net fresh pineapple flush, chopped into pieces
40g net passionfruit pulp (about 3 passionfruit)
1 2/3 cups of caster sugar
2 1/2 tablespoons Jam Setta

Method:

  1. Use the pulse action, coarsely process the pineapple. Don't over-process as the jam will be too smooth.
  2. Add the pineapple and passionfruit into the bread machine followed by sugar and the Jam Setta.  Select the "button" and start the cycle. 
  3. Meanwhile, clean the bottle with soapy water.  Switch on the oven at 120c and tip the bottle upside down into the oven rack.  Sterile the bottle in the oven for 10 minutes or until the moist is evaporated.
  4. Pour jam into the bottle, moisten one side of preserver covers (clear plastic) with vinegar and place over the damp side up over bottle while jam is still hot.  Cover with the lid and plastic band. If possible, keep in fridge to keep the jam fresh.


Tuesday, February 14, 2012

Chocolate Heart with Ice Cream


When I went to the shopping centre this morning, I saw many young teenage crowding around the florist buying roses for their Valentine.  It is sweet to feel the love in the air!  My husband and I don't really celebrate Valentine's Day too much these days as it was just after our wedding anniversary.  But I want to make something for him this year.  As the weather has been very hot, I got the ideas of making this heart shaped ice-cream.  We sit down at the coffee table to share the ice-cream after lunch, and I can feel the romance that is still running in our heart!  He has been my love, my friend and my supporter when I needed him most.  He is the person that care me most and I just can't imagine a day without him!  Happy Valentine's Day and I hope you have found your love!

Heart Shaped Ice Cream with Mixed Berries Sauce


Dark cooking chocolate or chocolate of your choice
Vanilla Ice cream or ice cream of your choice

For the sauce:
70g frozen mixed berries
1 tablespoon water
2 tablespoons sugar
1/3 teaspoon cornflour
1/4 teaspoon Kirsch

To make the heart shape mould:
cardboard
foil
bull clip

Method:

  1. Cut out the cardboard into a long strip about 3 cm wide, fold into half.  Use the stapler to staple the middle to form the curve of a heart shape. Leave the end open.  Wrap around the cardboard with foil with a smooth interior. 
  2. Line a small baking tray with a piece of foil.  Place the heart shaped cardboard in the tray and fill up with ice-cream.  Freeze until ready to serve.
  3. Meanwhile, gently cook the berries with water, sugar and cornflour until it becomes a thick sauce. Leave cool.
  4. Melt chocolate in microwave under medium heat until the chocolate is ready to use.  Fill the chocolate into a zip bag.
  5. Unclip the mould and gently pull the mould apart.  Turn the ice-cream over with the smooth top facing up, trim edges if needed.  Cut a tiny bit from the corner of the zip bag. Decorate the ice-cream with chocolate and use the left-over chocolate to decorate the plate.  
  6. Spoon the berries sauce over the plate and share it with you sweet heart!


Saturday, December 10, 2011

Rustic Caramelized Peach Tart


This peach tart is the front cover for the cookbook written by Maxine Clark.  I made her strawberry vanilla tart a few months ago when strawberry is in season.  I don't think that tin peach would taste the same as the fresh one so I wait till the peach season arrives to make this French style tart.  I chose to make the pastry using the cheat's rough puff pastry method by grating frozen butter onto the flour before folding.  The best part of this tart is the crispy buttery crust and the sugary caramelized peach syrup.  It's a simple form of tart that doesn't need any special tart tin but you need the skill to fold the pastry.  And I could tell you that it worths the effort!  I could image myself sitting at the veranda with red and white checkers tablecloth looking at the rural view from the French farm while sipping a cup of tea.  It's so simple and so good.  

Rustic Caramelized Peach Tart


Pastry:
250g plain flour
a pinch of salt
150g unsalted butter. frozen
150ml or a bit more iced water

Filling:
4-6 ripe peaches
55g butter
juice of 1/2 lemon
150g caster sugar
whipped cream or creme fraiche, to serve


Method:

  1. For the pastry: Sift flour and salt in a mixing bowl.  Hold the butter in a tea towel (I use glad wrap) and quickly grate the butter into the flour.
  2. Stir the butter into the flour with a knife.  Pour in water and mix with knife again until a messy lump is form.  Add a bit more water if needed.
  3. Knead until it forms a streaky, lumpy ball.  Wrap with glad wrap and chill for 30 minutes until firm.
  4. Sprinkle some flour onto the kitchen bench or work on a piece of baking paper.  Unwrap the dough and roll out away from you into a long rectangle 3 times longer than it's wide with 1 cm thick.  Remove any excess flour on the surface with a brush.
  5. Lightly mark the pastry into 3 equal parts with knife then fold the 3rd closest to you over the middle and then fold the top third to cover the folded parts.
  6. Turn it anticlockwise 45 degree like a book shape, then mark at one edge with finger to indicate you have completed 1 roll, then repeat the rolling and folding once more.  Rewrap and chill for 15 minutes.
  7. Repeat rolling and folding twice more then wrap and chill for 30 minutes ( I chill for 15 mins) before rolling into shape.
  8. Roll out the pastry and cut into a circle with 28cm in diameter about the size of a large dinner plate over baking paper.  Twisting the pastry over itself to make the edge.  Press slightly to seal and transfer onto a baking tray and chill for a further 15 minutes.
  9. For the filling: Halve and pit the peaches and cut into chunky slices.  Heat butter in a saucepan the add the lemon juice and 1/2 sugar.  When the butter and sugar melted, add the peaches and toss gently.  Pile the peaches over the pastry with some butter sugar sauce and sprinkle the remaining sugar.  Bake at preheated oven at 230c for 20-25 minutes or until golden, puffed and caramelized. Serve with cream.
Source: adopted from the cookbook, Tart - sweet and savoury by Maxine Clark


Tuesday, December 6, 2011

Mini Cream Horns & Palmiers with Honey Cream

cream horns with honey cream and nutella cream

What a start off for the summer holiday with rain!  It has been raining for a few days and the kids are feeling bored staying indoor (they may not be that bored if I haven't restricted them to use computer for only 2 hours a day!) So we head into the kitchen and look for things to make.  We have some frozen puff pastry and cream, and I have these cream horn moulds and some very large strawberries. The first batches of the cream horns and palmiers were gone in a flash as we were so hungry and they tasted so delicious.  My daughter made her palmiers with white chocolate and caster sugar from the recipe she learnt at school and I put in nutella with whipped cream for the cream horns for something different.


Mini Cream Horns

1 sheet of puff pastry, thawed
1 egg, beaten
thicken cream, whipped
honey
nutella
strawberries
icing sugar for dusting

Method:
Cut pastry into 12 strips about 2cm wide.  Lightly grease the mould, then starting rolling the pastry onto the mould starting from the points of tins.  Place horns on baking tray lined with baking paper and brush them with egg.  Bake in hot oven till puff up then reduce to moderate until horns are lightly browned and crisp.  Pipe in honey cream or nutella cream, dust with icing sugar and garnish with strawberries.

For honey cream and nutella cream: add 1/2 teaspoon of honey to 1/3 cup whipped cream and add 1 heap tablespoon of nutella to 1/2 cup whipped cream.


Palmiers with Honey Cream

1 sheet of puff pastry, thawed
raw sugar
ground nutmeg
honey cream

Sprinkle sugar and nutmeg evenly over the pastry, loosely roll one side at a time into the middle until both sides meet.  Sprinkle extra sugar onto the bottom of the pastry as you roll up so that both sides are coated with sugar.  Roll the pastry over to form a log shape. Cut pastry into 5mm thick pieces.  Place the cut side up with a V-shape onto the baking tray lined with baking paper.  Bake at hot oven for 15 minutes or until golden brown.  Serve with honey cream.


white chocolate palmiers
My daughter made this for her art project. Couldn't stop hugging it!